Dabble vs. NovelPad: Which Makes This Writing Thing Easier?


Who reigns supreme in the Dabble vs. NovelPad debate?
Let me tell you, for a lot of writers, that’s a tough call. Both of these programs boast brilliant features that make the writing life way easier.
Ultimately, it’s not really a question of which is better. It’s about which is better for you.
Which of these innovative writing tools addresses your biggest needs as an author?
This guide will help you find that answer for yourself. You’ll learn everything you need to know about the layouts and features of these programs. You’ll discover how they differ so you can choose the one that serves your priorities.
And if you’re here only because you overheard another writer use the word “Dabble” or “NovelPad” and decided to Google it, you’ll find out what those words mean.
Starting now.
Dabble vs. NovelPad: An Overview
One thing that makes it tough to pick a stance in the Dabble vs. NovelPad debate is the fact that these are very similar platforms.
Both programs include comprehensive tools for plotting, drafting, and revising your novel. Both allow you to collaborate with others, keep your brainstorming sessions organized, and review your story at a glance.
But they’re not identical.
To help you get your bearings in the Dabble vs. NovelPad discussion, here’s a broad overview of each platform’s most distinctive features.
What is Dabble Best Known For?
When you hear writers sing the praises of Dabble, the chorus is almost guaranteed to mention either the Plot Grid or the ease of the program.
The Plot Grid is Dabble’s flagship feature. It’s inspired by the same system used to write the Harry Potter novels. That alone should tell you something about the Grid’s usefulness in tracking multiple plotlines, character arcs, and themes.
A little later, we’ll get into how you can use the Plot Grid to outline your novel. But you can probably get the idea of how it works just by looking at it.
And that brings me to Dabble’s next big selling point. It’s immediately understandable. Many writers are drawn to Dabble because they’re looking for a comprehensive writing tool that doesn’t have the steep learning curve of a program like Scrivener.
If you get in on Dabble’s free trial and just mess around with it for a few minutes, you’ll see how intuitive it is.
And there are enough features to make your writing process easier but not so many that you become consumed by the novelty of organizing your ideas in twenty different configurations. All this to say: Dabble is designed to make sure your novel is the star of the show.
What is NovelPad Best Known For?
NovelPad’s stand-out features are the ones that allow you to review and analyze your work through different lenses.
Like Dabble, NovelPad provides integrated tools for plotting and drafting your novel. What’s unique is NovelPad’s tagging system and Insights view. Simply put, these functions allow you to track specific threads or look for patterns.
For example, if you wanted to review a character’s arc, you could jump to Character view and review only the scenes involving that character.

Pretty cool, right?
NovelPad also offers different views of your outline as well as the option to work in a manuscript/outline split screen.
Now, you may already have a sense of which writing tool is the best one for you based on these high-level benefits. But it’s also worth taking a look at how these two programs function.
Let’s break it down.
Dabble’s Layout
As you’ll soon see, Dabble’s look is all about simplicity. After all, the goal here is to keep you focused on creating your masterpiece, not operating the program.
Project View
When you first log into Dabble, this is what you see:
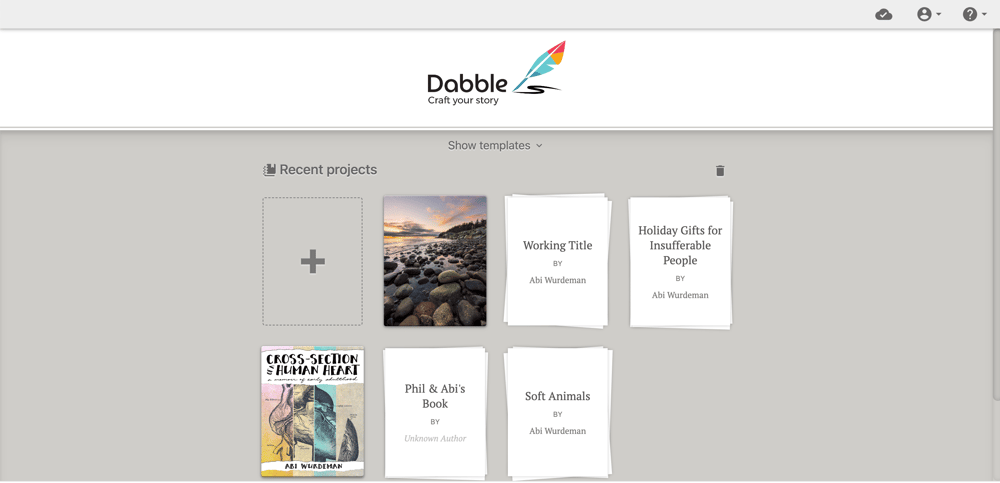
Pretty straightforward. You’ve got your projects along the bottom and the templates menu up top, which is hidden by default.
You can also upload a cover image for your projects, whether it’s your actual book cover or just a photo that gets you in the zone.
From here, you can click on an existing project, start a new project from scratch, or start a new project using a template.
Here are the different views you get once you’re inside your project:
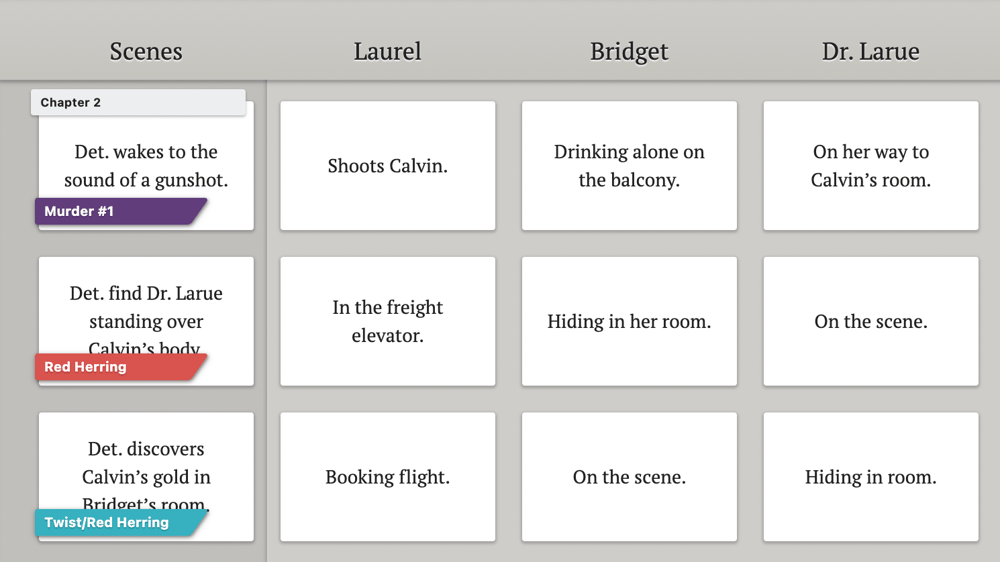
Plot Grid
This is that fancy-shmancy plotting system I mentioned earlier.
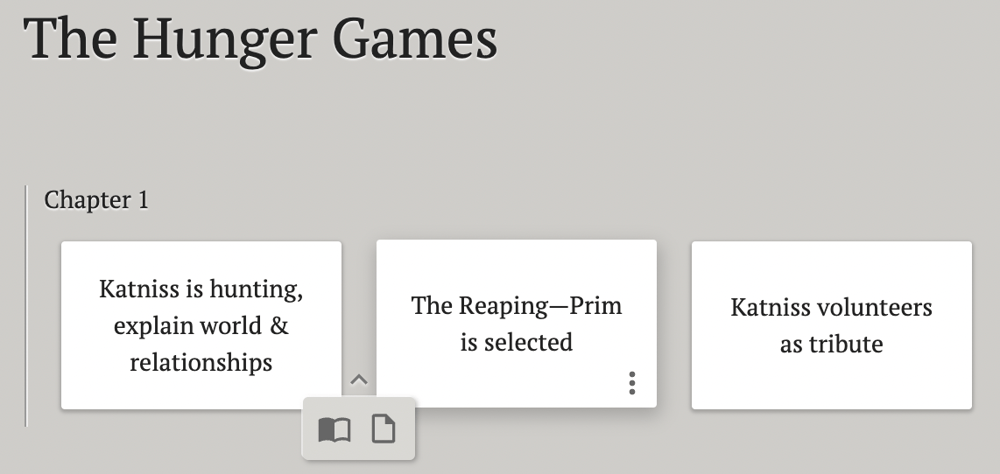
The first column of the Plot Grid contains your Scene Cards. Dabble automatically creates an outline based on these Scene Cards. Your outline doubles as a navigation menu, allowing you to click between scenes in your manuscript.
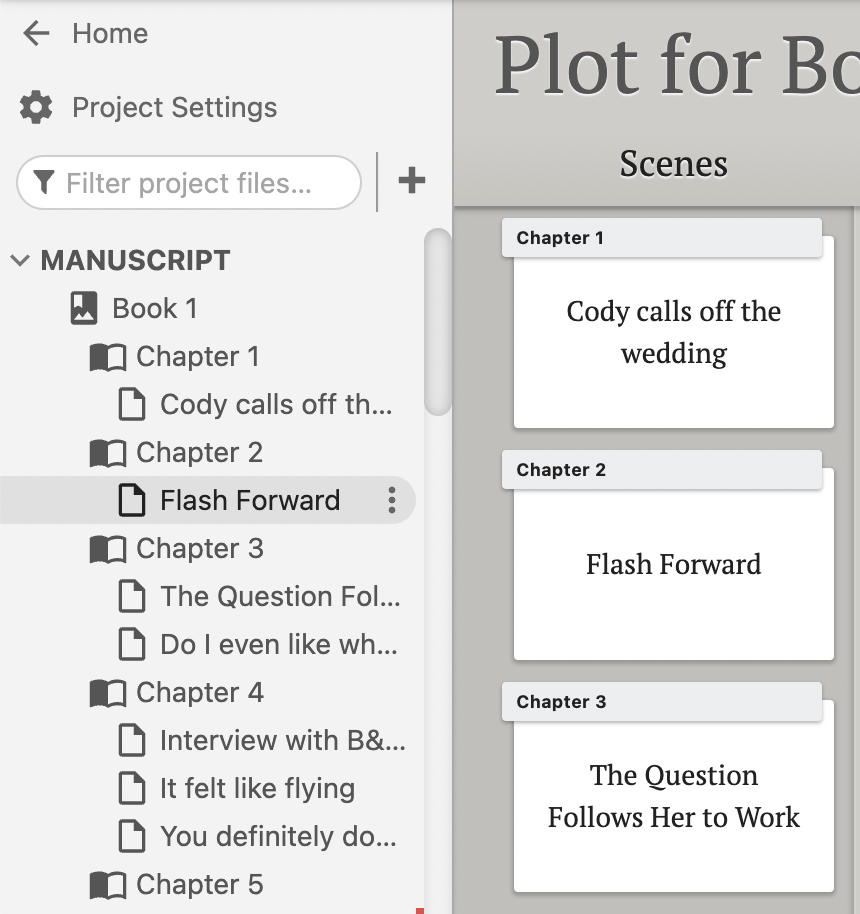
It’s all interconnected, you see: Scene Cards, menu, manuscript, and every living thing in the universe.
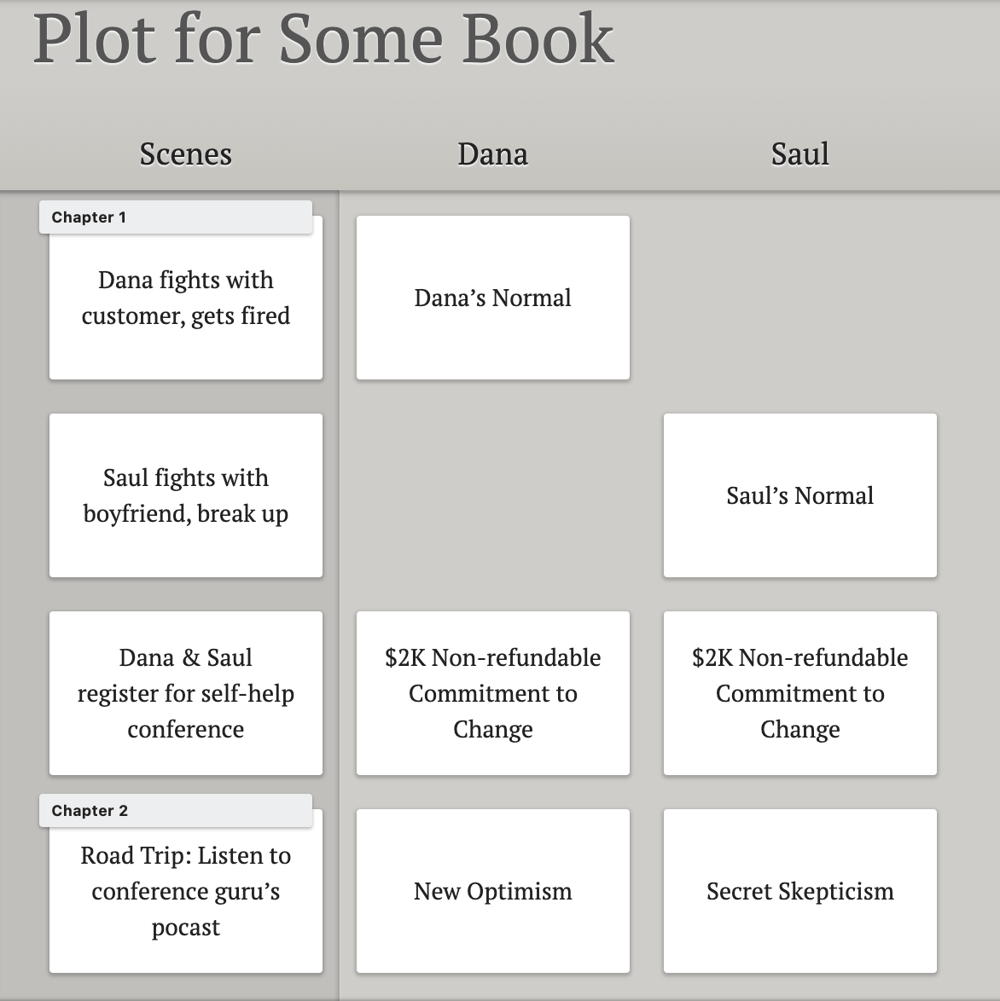
Now, you can add columns to your Plot Grid to clarify which plotline each scene furthers, how it contributes to character arcs, and more. Tack on as many as you’d like and label them however you wish. Your Plot Grid might look like this:
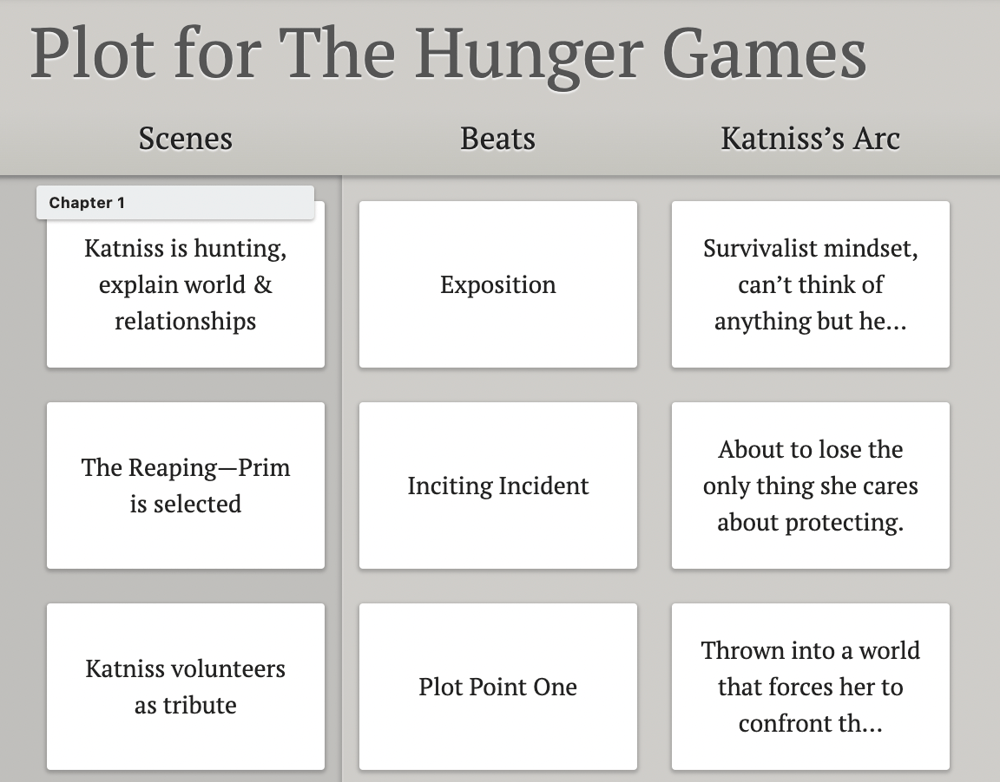
Or this:
Or a million other ways.
This feature is yours to customize so you can track the progress of anything as your novel unfolds. Stay on top of alternating timelines. Ensure that the progress of the intergalactic war mirrors your protagonist’s domestic turmoil. Make sure all your character arcs are, you know, arcing.
This is your circus. Go crazy.
The Plot Grid also features Labels, which are color-coded ribbons you can add to your Scene Cards (as seen above).
I use these to remind myself that a scene needs more work or to trace the emotional journey of my novel. But like the Plot Grid, they’re designed to function however you need them to.
Manuscript View
For a super-tidy, to-the-point view of your plot, you can go here:
Welcome to your Manuscript View. This is where you can see your story all laid out and add chapter breaks. Pretty straightforward stuff.
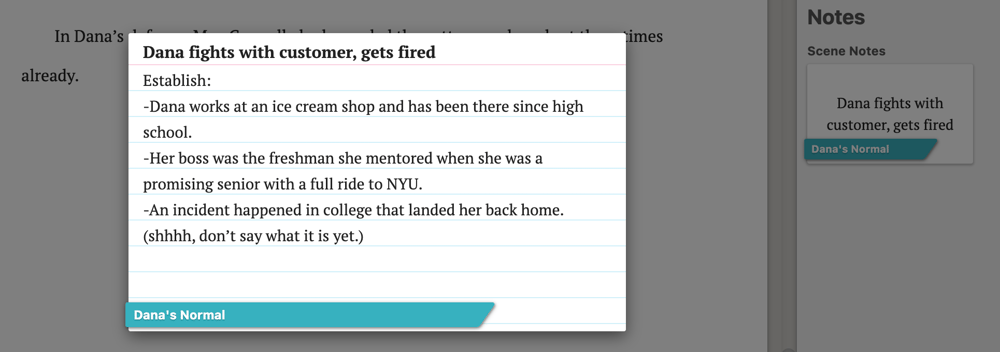
Story Notes
Story Notes are the most free-wheeling planning tool in Dabble. The notes themselves are basically wide-open documents with no pre-set structure.
This makes them great for brainstorming sessions, research dumping, and designing character profiles and worldbuilding bibles on your terms.
You can create as many Story Notes as you need and file them according to whatever system makes sense for you.
Manuscript
When you’re ready to write, all you have to do is click on a scene in your navigation menu and start typing.
As you draft your novel, you’ll always have these tools at hand:

Speaking of which…
Dabble’s Writing Tools
Let’s take a look at the tools that make writing a novel with Dabble a breeze.
Scene Cards
To add a Scene Card to your Plot Grid, all you do is click and type. Include as many or as few details as you want. The same goes for all the cards in the columns you create.
Then, when you write in the corresponding scene in your manuscript, you’ll have those notes right there on the right-hand side of your screen. Need to remember how this scene furthers your protagonist’s arc? Just click on a Scene Card to read what it says without leaving your manuscript.
Goals & Stats
This is a fun one. Dabble’s Goals & Stats feature allows you to set word count objectives.
You can keep it simple and set a daily word count goal. Or you can tell the system how many words you want to write by when. Then mark off the days you don’t plan to write. Dabble will calculate a daily word count goal for you and keep track of your progress.
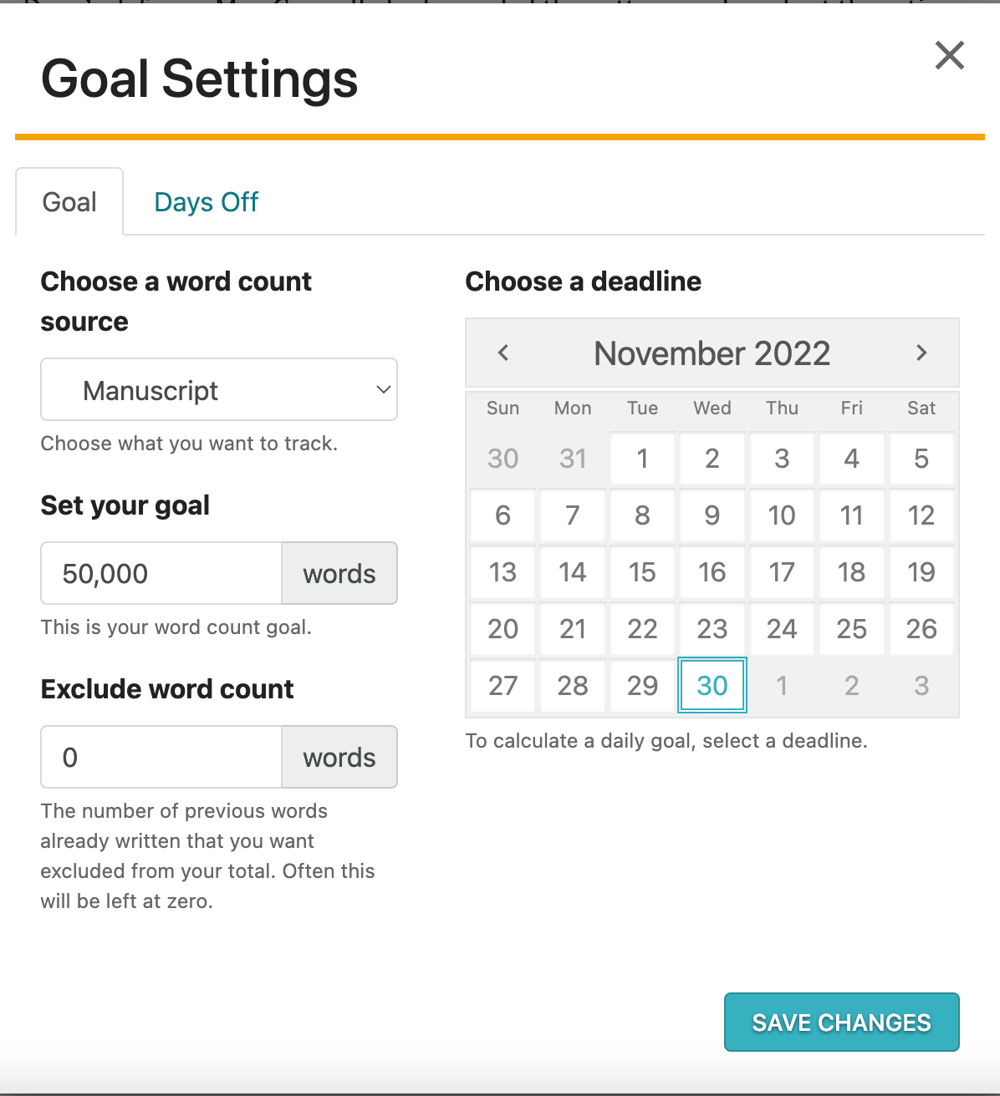
This feature even integrates with NaNoWriMo, automatically updating your NaNo dashboard as you write.
Then there’s my favorite part of Goals & Stats: you get a li’l celebration when you reach your daily word count.
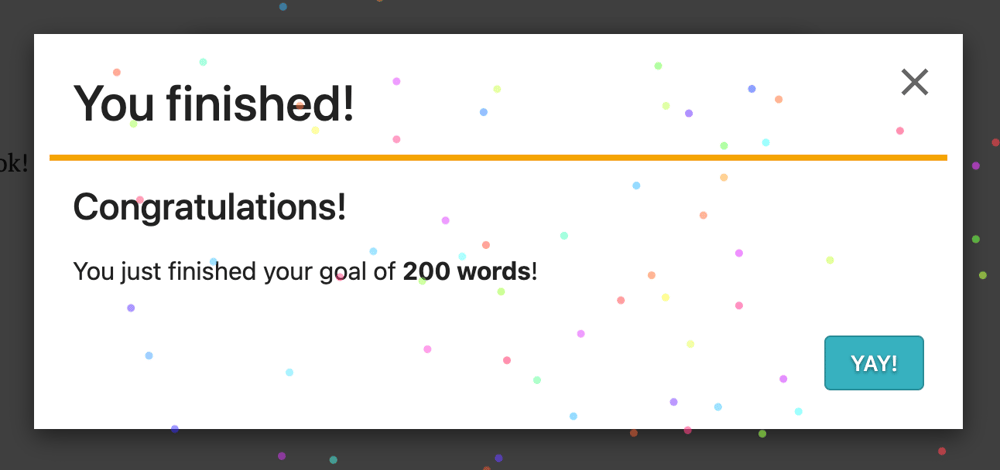
Heaven knows we could all use a little confetti when we’re up to our knees in act two’s muddy middle.
Comments and Stickies
Whether you share your project with a collaborator or just need to talk to yourself, comments and stickies are there for you.
Stickies work like this:
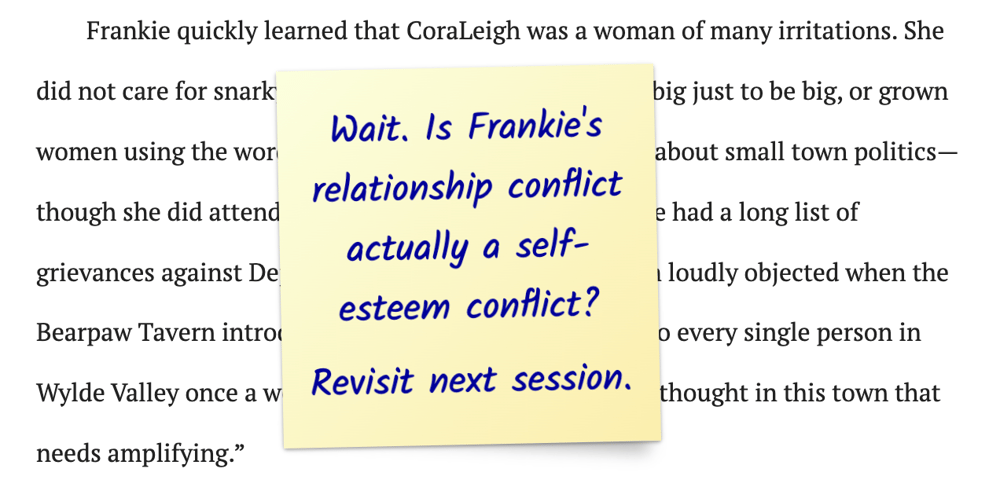
Comments work like this:

Word Tools
Built-in thesaurus? Check. Grammar, style, and spell check powered by ProWritingAid? Got it.
There’s even a “read to me” feature so you can close your eyes and hear your words read back to you by a fancy English lady. (Or whichever voice you choose.)
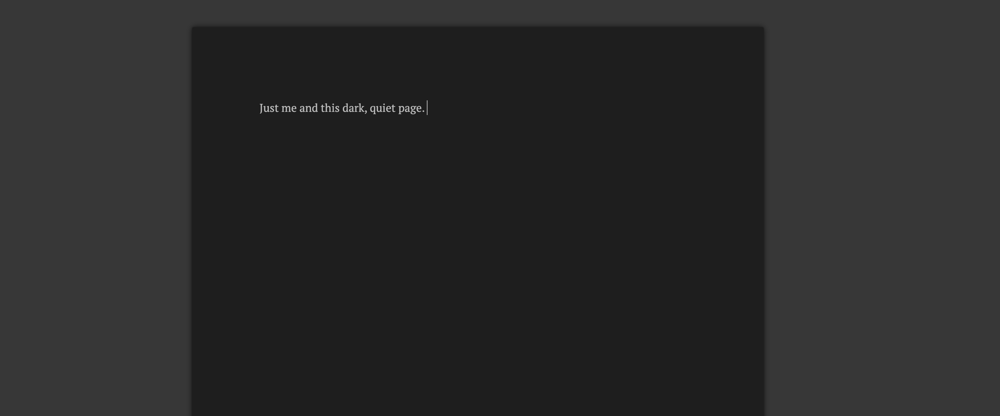
Focus Tools
I mentioned that Dabble is designed so that the functions don’t distract from your novel. The auto-fade option takes the most literal approach to this goal by hiding all menus and icons as you type. It’s just you and your manuscript.
You can also choose between the default theme, dark theme, or an auto theme that switches automatically with your device.
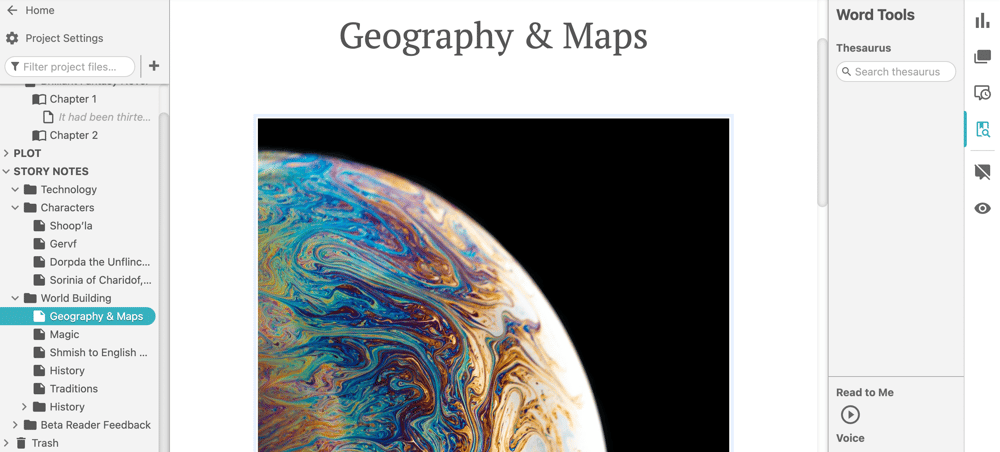
Image Uploads and Search
Upload images to your manuscript or Story Notes. This includes everything from character and setting inspiration to world maps and brainstorming webs.
Dabble also has a built-in image search powered by Unsplash. Talk about convenience.
Multiple Books Per Project
Writing a series? You can add multiple books within a single project.
I love this feature because it allows you to brainstorm series arcs without leaping from project to project.
When an idea for Book Four hits you while you’re writing Book Three, you can just jump over to the Book Four Plot Grid and drop the idea in without losing writing momentum. Can’t remember what you named your protagonist’s aunt in Book One? The answer is exactly one click away.
Dabble’s Collaboration Options
Another major selling point for both Dabble and NovelPad is the option to collaborate.
Dabble’s Premium package gives you access to co-authoring. This allows you to share your project with another writer or editor. You can collaborate in real time, side-stepping the burdensome process of downloading documents, sending files, and swapping notes.
You can also indulge the collaborative spirit with writers who aren’t your co-author by sharing templates. Whether you create the ultimate Plot Grid strategy or a fellow writer has devised the perfect worldbuilding bible, you can create a link to share your shortcuts.
In short, Dabble has a lot of cool features. So what does NovelPad have to offer?
NovelPad’s Visual Layout
Because these two programs have so many similar features, the look of the program might be a deciding factor in your Dabble vs. NovelPad deliberations.
Project Dashboard
When you first log into NovelPad, this is what you see:
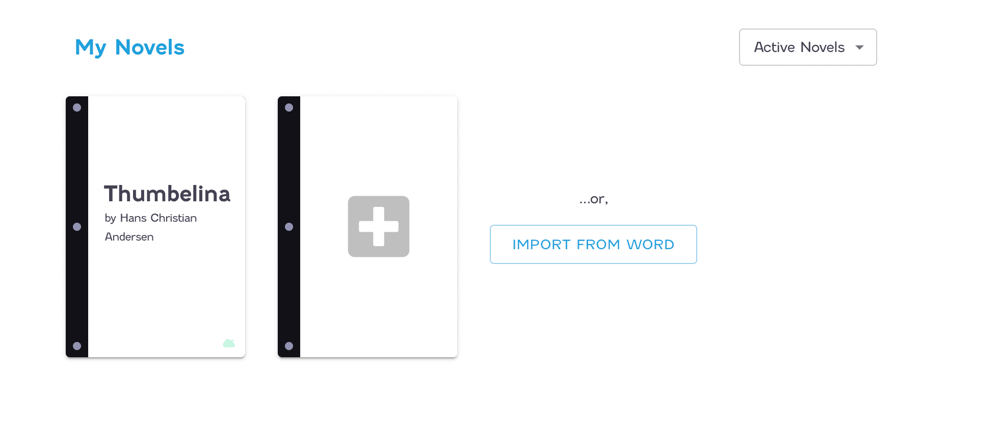
Pretty straightforward. There is some hidden magic on this page, but we’ll get to that in the next section.
Click on your project, and it brings you here:
Manuscript
Your NovelPad manuscript looks like this:
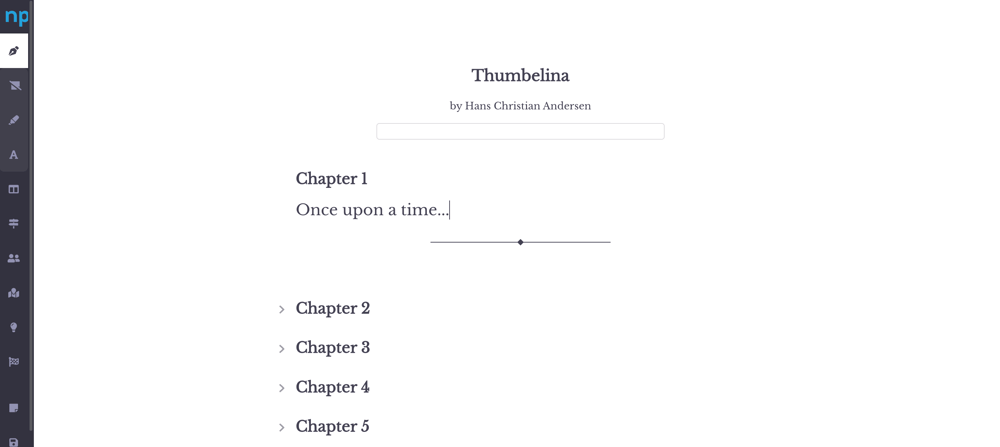
You’ve got a minimalist toolbar and navigation menu on the left-hand side. You can also collapse your chapters to hide their text.
Now, to see how I got all those chapters and scene separators in there, let me show you the Chapters view.
Chapters
This is where you lay out the scenes of each chapter. You can orient your chapters this way:
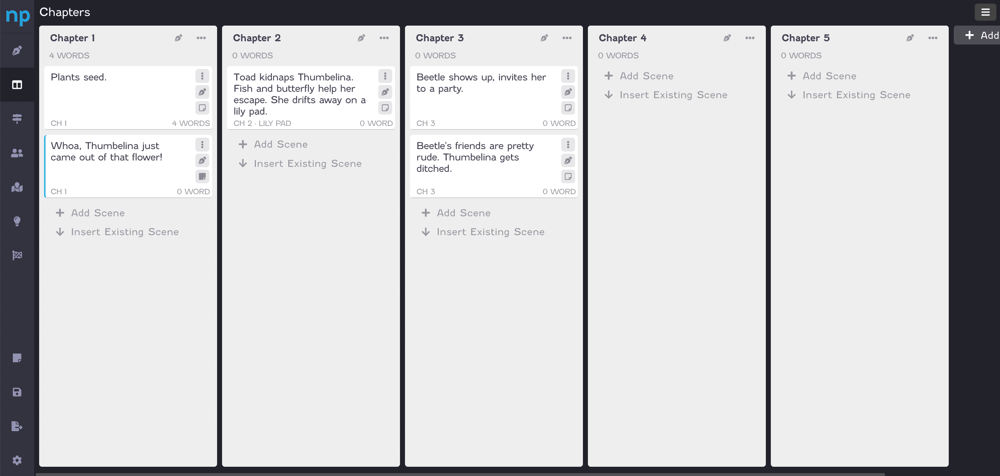
Or this way:

It’s up to you.
If you want to keep your outline visible as you write, clicking on the manuscript icon in a scene or chapter will bring up that section of your manuscript.
Neat, right? You’ll find that same split screen feature in this next view.
Plots
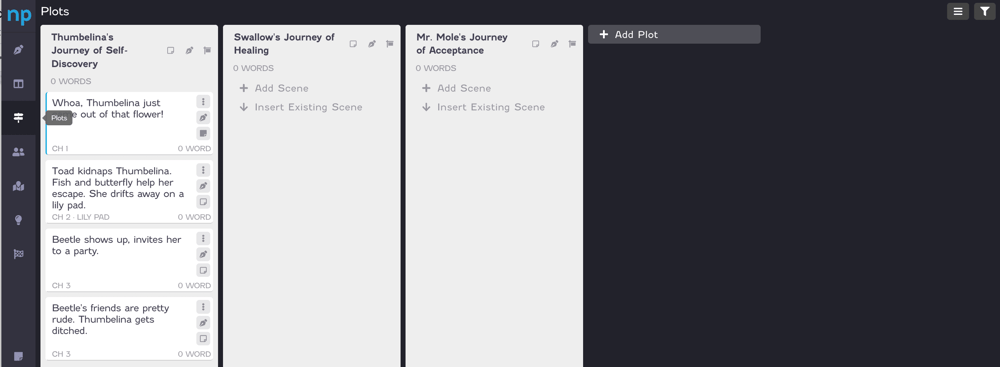
This is where you can keep track of multiple plotlines. It’s not quite the same as managing plotlines in Dabble’s Plot Grid, because you’re not able to see where the beats of different storylines land in relation to one another.
Regardless, this view allows you to see all scenes of a single plotline in one spot. This makes it easier to track the progression of a story, follow the arc of a character, look for continuity issues, and more.
You can even click on the manuscript icon to write or read a single plotline straight through.
Now, there are two more tabs that follow the exact same layout as Plots and Chapter. Those are Characters and Locations. Since they’re so similar in appearance and function, I won’t dive into them here. You’ll see them when we get into the writing tools later.
For now, you I want to show you:
Insights
This is how NovelPad does grids. Different function, similar look.

Insights allows you to examine the cross-section of two different story elements. You might look at plotlines and chapters to make sure you’re weaving your storylines together well.
Or maybe you want to look at characters and locations because a beta reader got annoyed that your protagonist’s mom never leaves the kitchen.
There are a lot of reasons this function could come in handy for both plotting and revising.
Novel Pad’s Writing Tools
Now that you know how NovelPad looks and operates at a high level, let’s dig into the details.
Scene Cards
Each individual scene comes with a menu that looks like this:
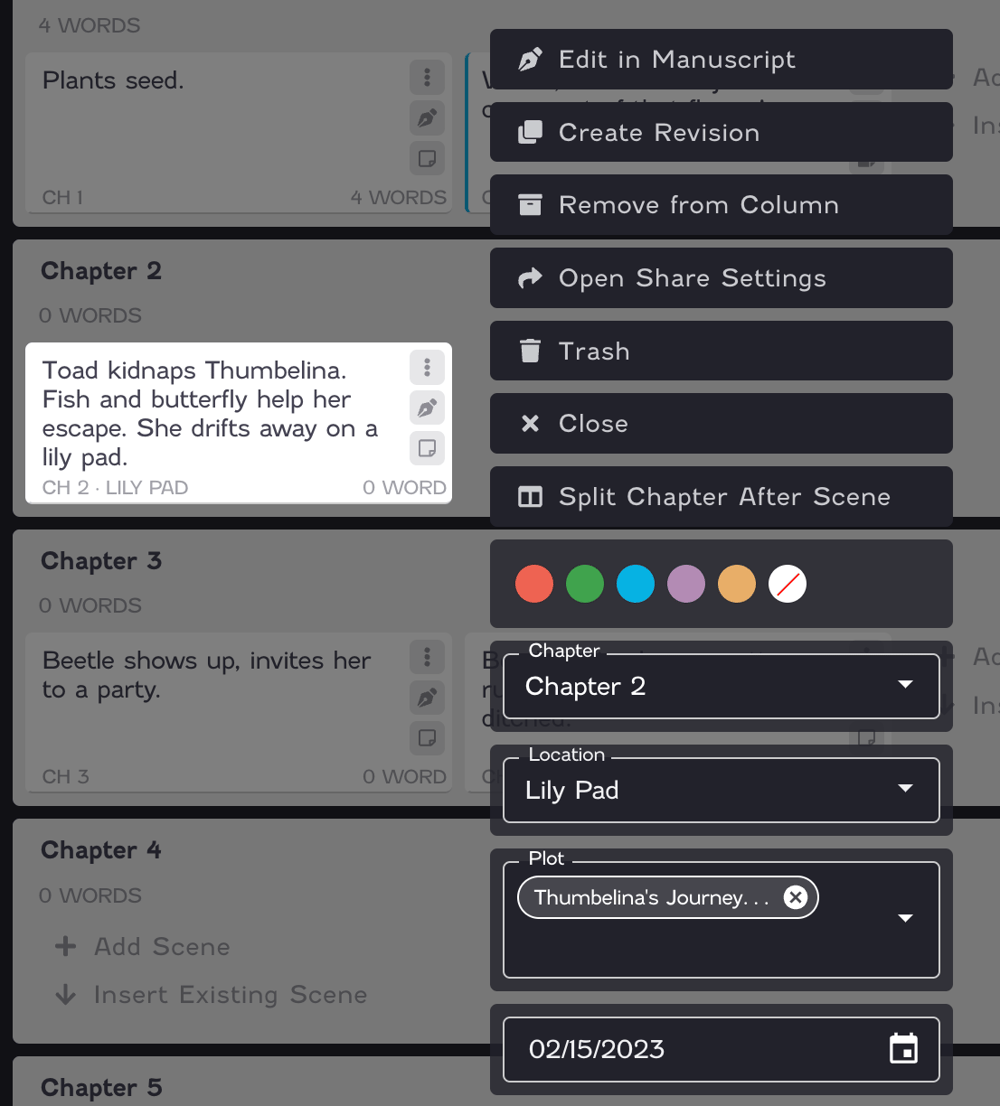
A lot of that is fairly self-explanatory, but there are a few unique features you’ll want to know about.
Clicking on “Create Revision” generates two identical versions of the same scene so you can revise one while keeping the original in front of you. When you’re done, you can choose to make your revision the primary scene or trash it.
The colored circles allow you to tag your scene with colors according to your own coding system. Maybe red means the scene needs work. Maybe green means you’re assigning it to your writing partner. Your call.
You can also designate the location where this scene takes place and which plotline it belongs to.
Character Mapping
So this is cool. Each time you add a character (or a scene, for that matter), NovelPad immediately populates that character’s board with the scenes in which they appear.
This feature is bound to come in handy as you build character arcs and when you need to make sure you’ve changed the BFF’s hair color in all her scenes.
Click on the character icon to open your character notes. This is basically a big blank space for spilling all your ideas, similar to Dabble’s Story Notes but without the image upload option.
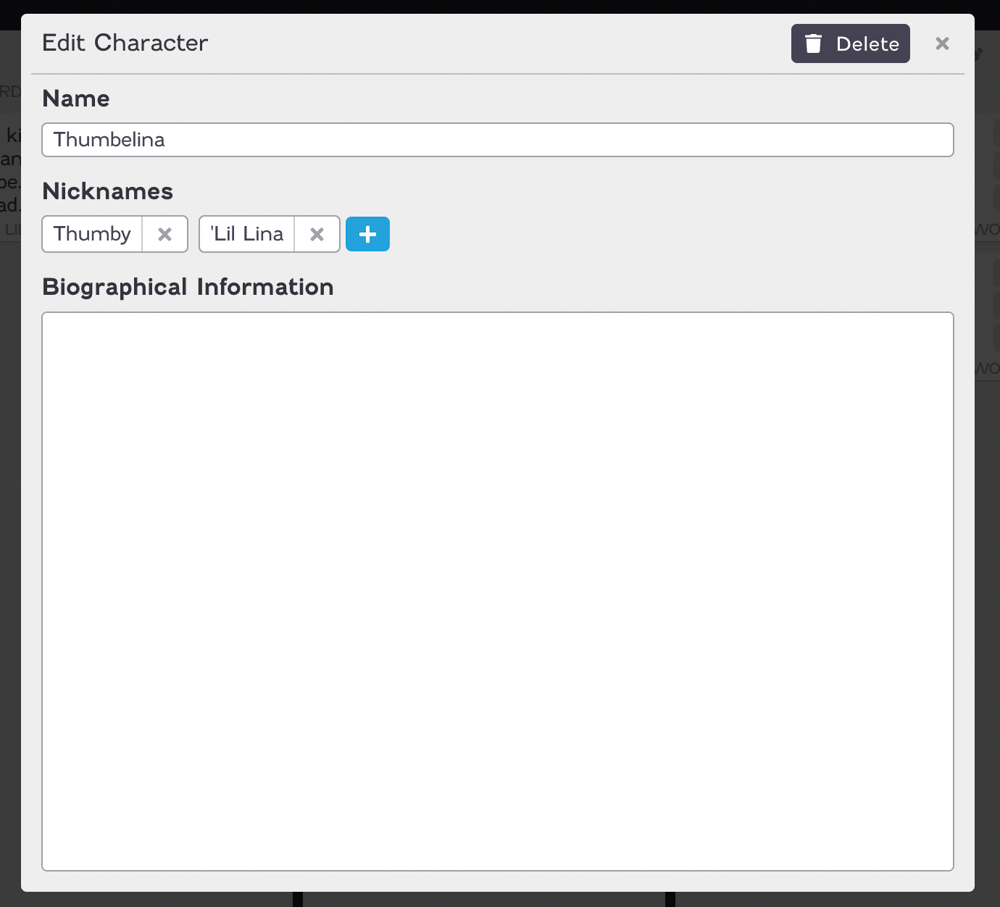
You’ll notice there’s also a place to add nicknames. This ensures the system doesn’t miss a scene where your character is mentioned by another name.
Locations
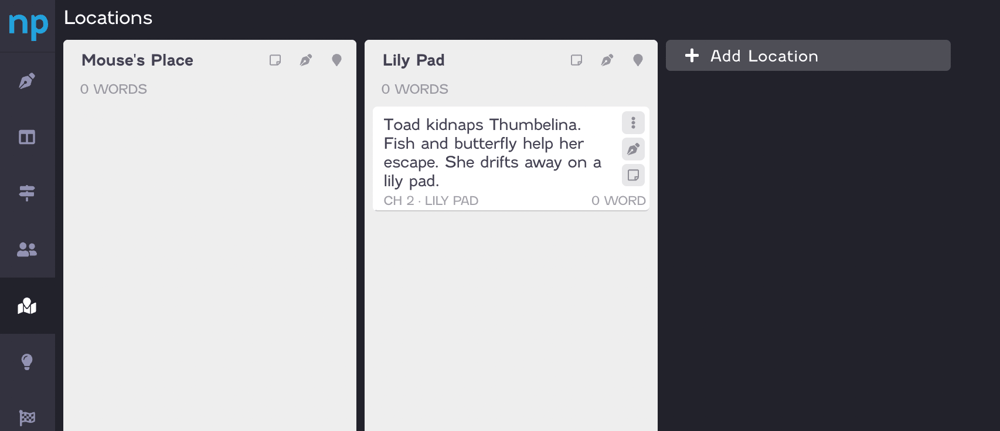
This is where you dream up all your settings. Once you’ve created a location, you can tag it in your cards.
You can probably guess what happens next.
That’s right. NovelPad populates all your locations with the scenes that happen there.
Goals
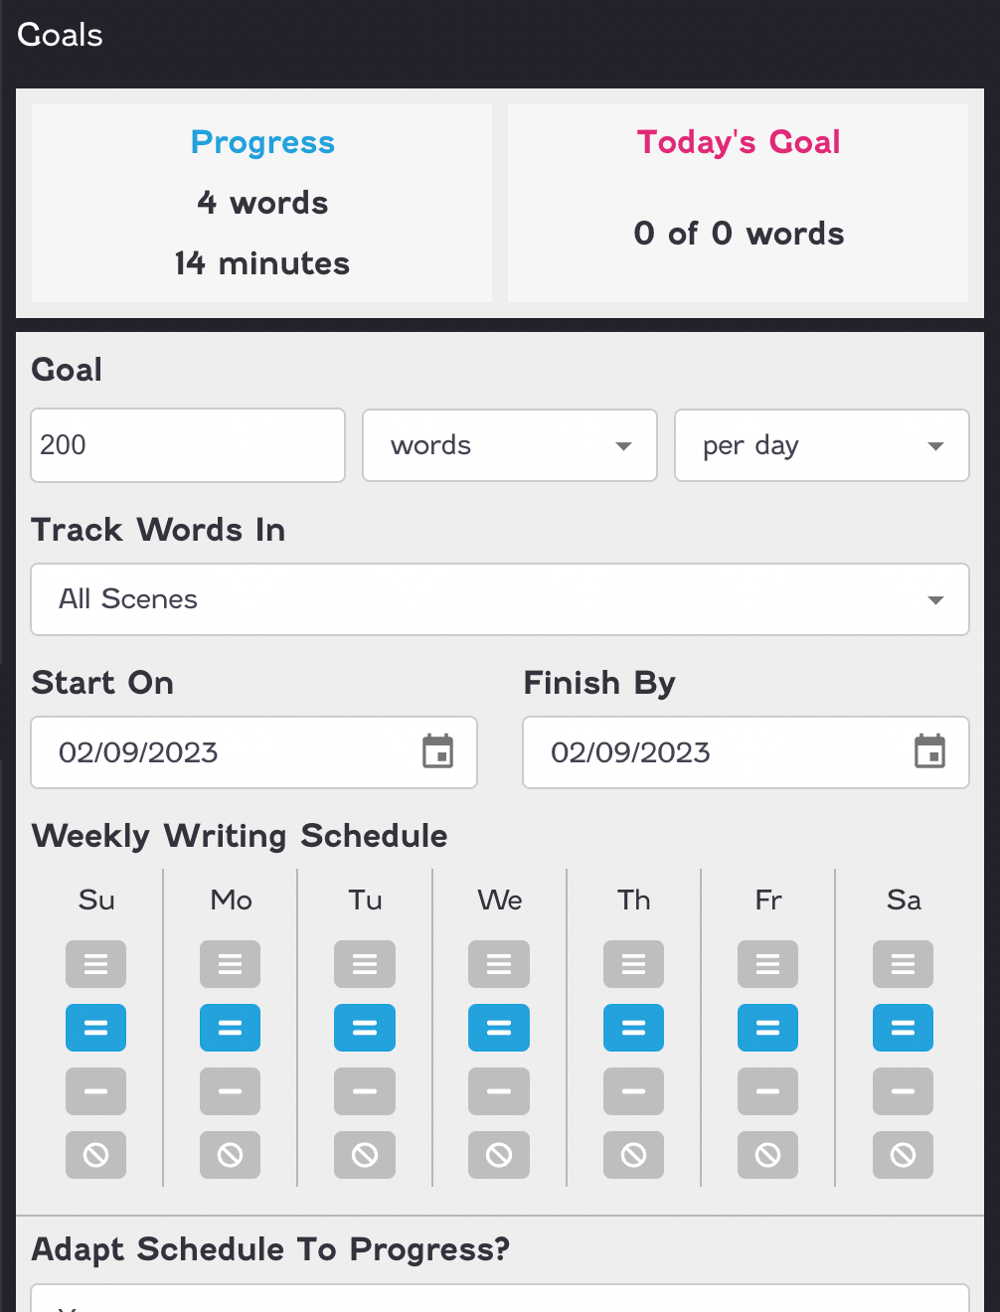
NovelPad’s goal tracking feature is similar to Dabble’s. You can set a goal, choose a deadline, and clarify which days you’ll be writing.
However, there are a couple differences.
With NovelPad, you can measure your goal by words or minutes. Having that option can be nice for the brainstorming stage, when it’s less about pumping out pages and more about putting in time.
However, NovelPad does not bring the confetti.
Notes
Like Dabble’s Story Notes, the notes section in NovelPad is basically a creative free-for-all.
You can create folders, build your world, store your research, throw down a few loose ideas for the next books… whatever you want.
And you can link notes to scenes, character, locations, and more.
Rewind
I promised I’d show you something cool on your projects dashboard. This is it.
Each project has a little “rewind” icon you can use to return to an earlier draft.
Did you decide you prefer the ending the way it was before? Did you return to your draft to discover that small, curious fingers or meandering kitty paws deleted an entire scene and added a three-page nonsense prologue?
Don’t sweat it. Just rewind.
NovelPad’s Collaboration Options
NovelPad and Dabble have pretty similar collaboration options. Both allow you to work with a co-author in real time.
One current difference is that NovelPad also offers a free Editor version. This allows folks who might not want to invest in a subscription—like beta readers and, you know, editors—to access your project.
Now, most writing tools are unavailable in the Editor version. So if you’re working with a writing partner, you’ll probably both want subscriptions. But this free version allows your project guest to comment and make changes, which is all you need when you’re just looking for feedback.
Dabble vs. NovelPad: A Quick Comparison
Still not sure where you stand on the question of Dabble vs. NovelPad?
It’s a tough call. These are both quality programs that do a lot to streamline your entire writing process.
They both offer web-based and desktop versions. Both autosave your work so you have nothing to worry about.
Even the pricing is similar. A NovelPad subscription costs $15/month or $120/year. That’s about the average cost of a Dabble subscription, though Dabble offers more pricing options. There are three different packages, each allowing you to choose between monthly, annual, or lifetime subscriptions. Dabble also offers special pricing for students and teachers. You can check out the packages here.
The good news is that both Dabble and NovelPad offer a 14-day free trial, so you can try both before you commit to one.
Still need a little more guidance?
Dabble might be your jam if:
- You could really benefit from seeing the true order of your scenes and the progression of individual storylines all in one place
- You’re the kind of writer who’s more likely to turn a lot of fun tools into an excuse to procrastinate
- Images are a key part of your planning and writing process
NovelPad might be for you if:
- It would help you enormously to be able to examine your story through several different lenses
- You work with editors and readers who would be down for reviewing your work in NovelPad
- You’re the kind of writer who thrives with a wide variety of organizational tools
How to Get Started
Ready to begin your Dabble and/or NovelPad adventure?
You can start your NovelPad free trial by clicking this link.
To learn a little more about the program, check out their tutorial videos.
As for Dabble, you can see the most popular features in action here:
Like what you see? Click here to start your free fourteen-day trial today and begin planning that breakout novel.
That’s what we’re all about, after all.
SHARE THIS:


TAKE A BREAK FROM WRITING...
Read. Learn. Create.

Conflict. It’s the lifeblood of any story. Without it, all you’ve got is a bunch of people wandering around aimlessly. Conflict is the source of tension, excitement, suspense, and drama. It drives your plot, gives your characters motivation, and sometimes allows you to hold up a mirror to the world.

You want to know how to write an adventure story—the kind of heart-pounding saga that keeps readers up until the wee hours, whispering, “Just one more chapter,” until their eyes dry out. Well, this is how it's done.

Maybe you've heard of foil characters before, but what exactly do these types of characters do? How can you make a good one? Don't worry, we cover everything you need to know about foil characters in this article.