How to Write Romance With Dabble (Guide + Template!)


If you’ve ever written a romance novel—or even just tried to write a romance novel—you know this genre involves a lot more than longing glances, love scenes, and a happy ending.
Great love stories begin with artfully crafted main characters whose personalities, fears, strengths, and desires shape them into beings who snap together like puzzle pieces. These tales involve immersive settings and pacing orchestrated to draw the reader in, charm them, tease them, devastate them, and dazzle them.
Then there’s the matter of tailoring the story to its subgenre and delivering the romance tropes readers love.
No doubt about it: kissing books might seem all fluffy on the outside, but writing romance is complicated, exhausting, and really, really tough.
That’s why it’s a good idea to have a dedicated novel writing tool to help you get the job done. There are a lot out there, but—and this may shock you—my personal favorite is Dabble.
With Dabble, you can brainstorm, plan, plot, draft, revise, and format your romance novel all in one place. This app has enough brilliant tools to make the process easier without being so complex that you have to spend a month learning how to use it.
In fact, my hope is that you’ll be ready to start writing your romance novel with Dabble by the end of this article. We’ll cover:
- How to plan a swoon-worthy love story with Dabble
- How to use Dabble’s tools to write a beautiful first draft
- How Dabble can help you polish your romance novel to perfection
You can even use this Dabble romance template to follow along and start planning your next love story.
But first, the big question:
Why Use Dabble for Writing Romance?

I’ll be honest: when it comes to novel writing programs, you’ve got plenty of options. But if you’re a romance writer, you’re going to want to give Dabble serious consideration.
As you’ll soon learn, this particular writing app offers enough structure that it gives you a clear blueprint to follow while also providing the flexibility to adapt its features to suit your exact purposes.
Need to create an extensive worldbuilding bible for your fantasy romance, complete with maps, historical information, and a spellbook? You can do it in Dabble. Need to track two timelines for your time-travel romance? Easy-peasy. Want to store all that historical romance research within a finger’s reach of your manuscript? Done and done.
Plus, Dabble’s character development tools are enough to make a writer positively giddy, and we all know that in romance, characters are everything. I’ll show you how to create in-depth character profiles and shape compelling arcs in this tool. It’s fun stuff.
So enough overviewing. Time to roll up our sleeves and write a romance novel.
How to Plan Your Romance Novel With Dabble
In case you missed the link above, here’s a template that includes a lot of what we’re about to go over. You can check it out now and follow along as we go or just bookmark it for when you’re ready to use it to write your romance novel.
If you don’t have a Dabble account, you can access the template by signing up for a free 14-day trial. Don’t worry—you don’t have to enter a credit card, so there’s zero risk of accidentally paying for a subscription.
It’s also totally cool if you just want to see what this article has in store for you before you even bother with the template. I’ll put the link at the end, too, so you don't have to go searching for it later.
Now let’s get this party started.
Set Up Your Dabble Workspace
When you open Dabble, you see your home page:
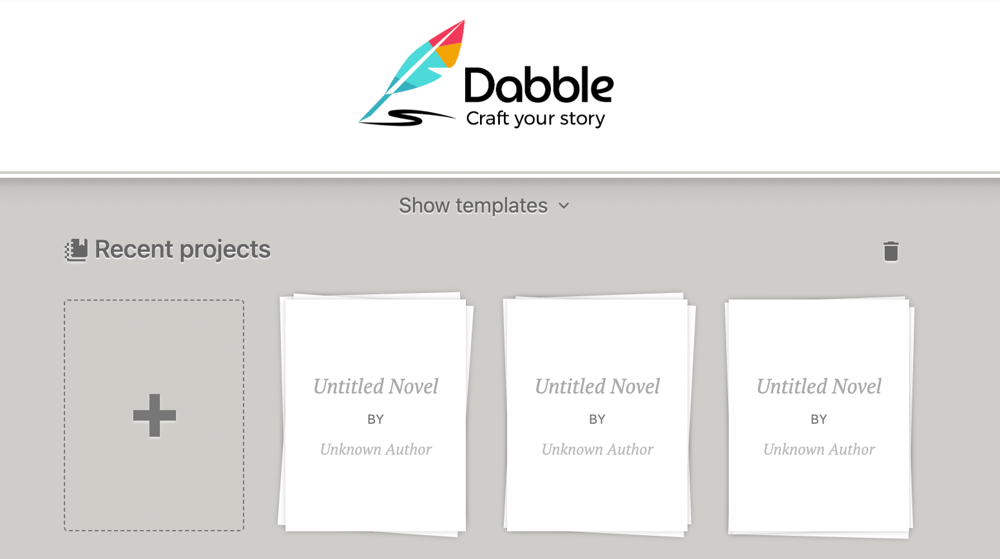
If you want to start a project from scratch, click the plus sign. That takes you to the project screen, where you can click on “Project Settings” to fill in your project’s title and author, set up formatting, invite a co-author, and more.

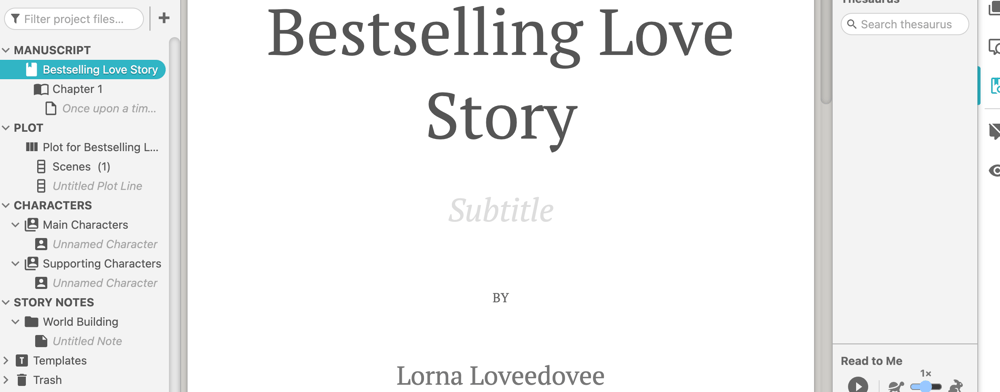
Exit out of Project Settings to fill out the title page of your manuscript.
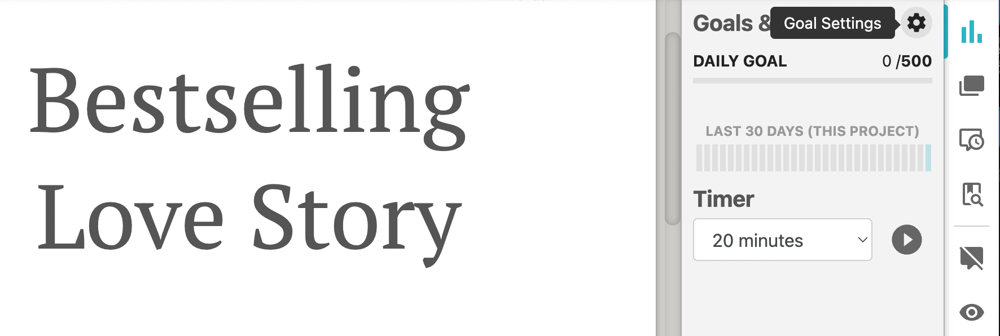
I also recommend setting a goal at this point. It’ll keep you motivated as you embark on this massive romance writing adventure, especially since you get a fun little confetti celebration every time you meet your daily word count goal.
To set a goal, click on the Goals & Stats icon at the top of the right-hand navigation menu.

Then click on the settings icon that appears in the top right-hand corner of the Goals & Stats bar.
Here you can establish a deadline for finishing your first draft, set a word count goal, and pick your days off. You can also choose whether or not to include planning features like character profiles and Scene Cards in your word count.
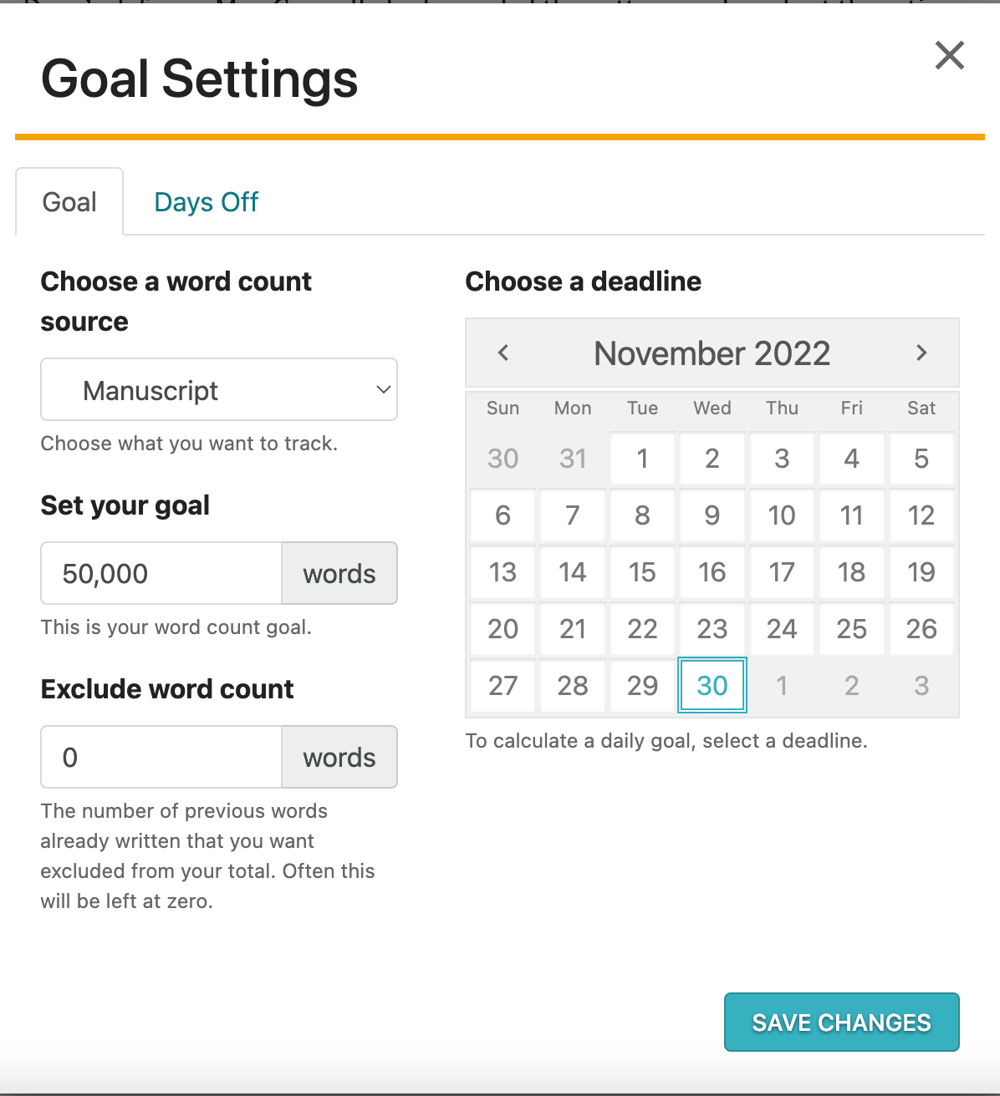
Dabble uses all that information to calculate your daily word count goal and keep you updated on your progress as you write.
Now that your workspace is set up, you’re ready to start dreaming up a story romance readers will love.
Create Your Character Profiles and Casts
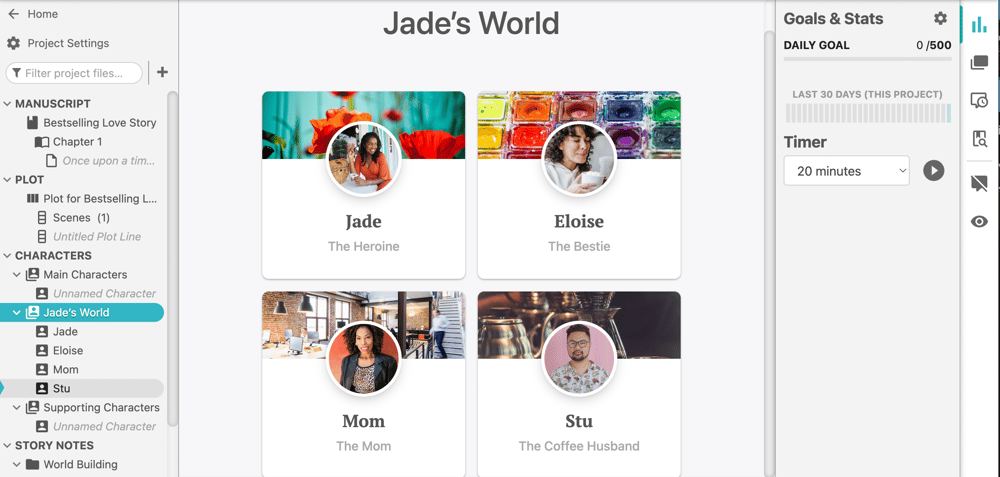
When you start with a blank Dabble project, you see that there are already two “Casts” in your Characters folder: Main Characters and Supporting Characters.

You can stick with these two Casts, though you have free reign to create as many as you like depending on the needs of your novel. For example, if you’re writing a fantasy romance, you might want to create separate Casts for mortals and magical beings.
For all romance novels, it doesn’t hurt to establish a Cast for the two (or more) love interests as well as separate Casts for the characters who inhabit each of their worlds.
I like this approach because a romance novel is very much about worlds colliding, and simply seeing each lover alongside the community that supports, challenges, and antagonizes them can help you think more deeply about how secondary characters might help or hinder their growth and love story.
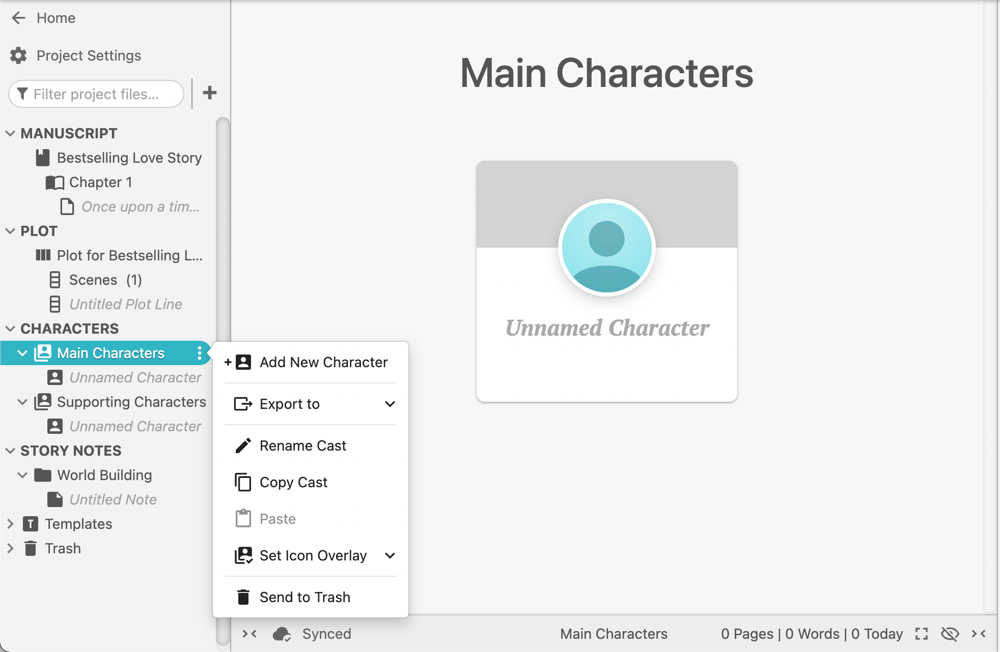
To add a new Cast, simply click on the three dots to the right of the “CHARACTERS” heading.

Then, to add a character, click on the three dots to the right of the Cast name.
This takes you to your character’s profile, where you can do all sorts of magical things, like add an avatar and banner image.
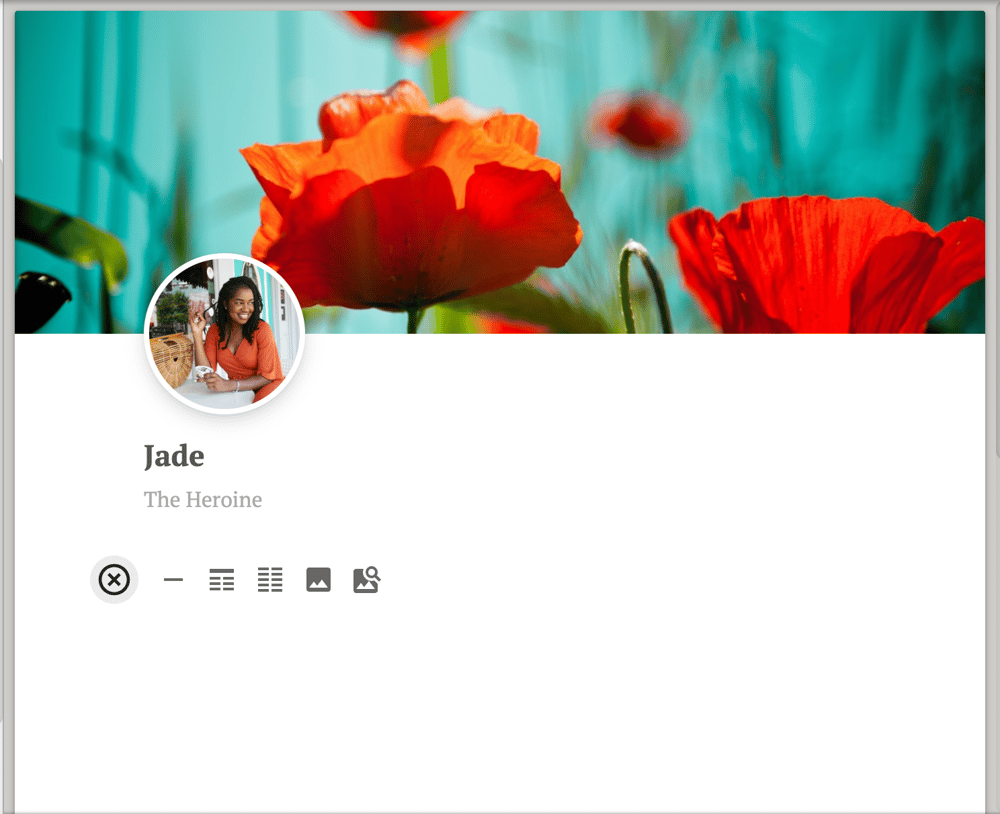
You can also format each profile any way you want. Just click on the little plus sign that pops up when you navigate to the body of the profile. There you’ll see options to insert images, property lists, and section dividers. You can also just start typing the way you would in a manuscript.
So that’s how you can create and organize romance characters in Dabble. Now let’s take a look at what should actually go into these profiles.
Key Characters in a Romance Novel
I won’t go too deep on this as we already have an entire article on creating great romance characters. But I’ll give you the gist so you have something to work with for now.
The Lovers
First, you’ve got your romantic leads. Depending on the way you decide to tell your story, they might both be main characters or you might opt to make one the protagonist while the other is a secondary character.
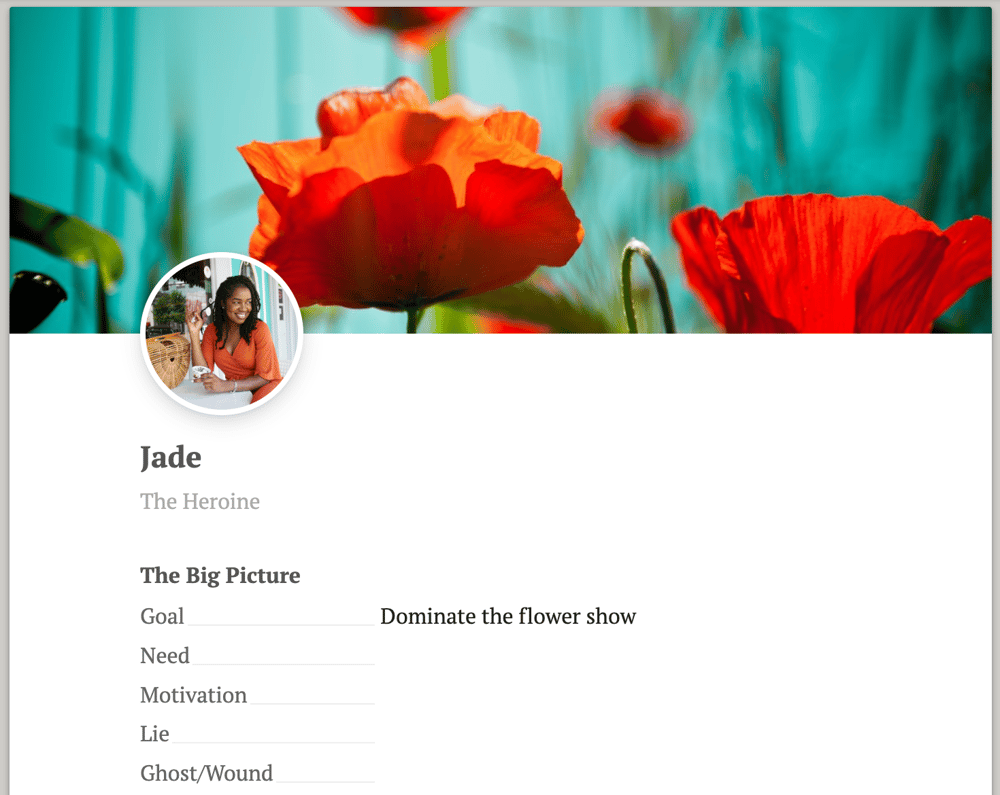
For these folks, you’ll want to establish their:
- External goal
- Need
- Motivation
- Lie
- Ghost/Wound
- Backstory
- Greatest fear
- Greatest weakness
- Greatest strength
- Major flaw
- Minor flaws
- Physical appearance
- Quirks
- Demographics
- Key relationships
- Career/hobby/passion
That is by no means an exhaustive list. As you create your romance characters, I highly recommend checking out this ultra-comprehensive character template. You can also conduct a character interview right there inside their profile. Check out this article for 65 solid character development questions.
Secondary Characters

As for your secondary characters, you don’t have to go quite as deep, but you still want a well-rounded understanding of who these people are, what they want, what’s important to them, and what they’re afraid of.
Some of these folks will either have subplots or make decisions that influence the central storyline, so give them enough depth for readers to feel invested in their choices.
You see all kinds of secondary characters in a romance novel, but as you likely know, it’s essential that each of your lovers has an ultra-supportive sounding board. This is usually a best friend (especially in contemporary romance), but it can also be a relative, mentor, close coworker… whatever makes sense.
The important thing is that they care deeply about your protagonist (and vice versa), know them better than anyone, and aren’t afraid to speak the truth.
Everybody Else
As you populate the universe of your romance novel, make sure you toss some tertiary characters in there, too. They’re good for filling out the world, providing comic relief, and delivering information. You might find it’s easiest to add these folks as you write.
Design Settings That Dazzle
Now let’s take a look at that left-hand navigation menu again. Under “STORY NOTES,” you’ll see you already have a “World Building” folder. Click on those three dots to the right to add more folders, notes, and images.
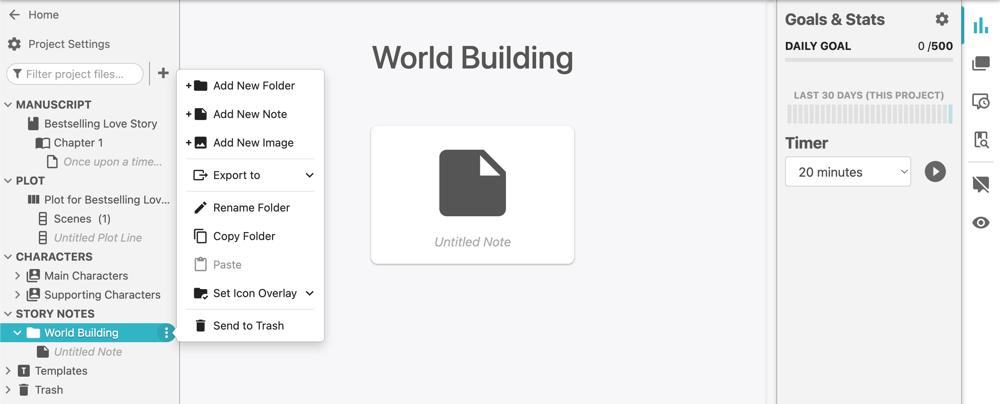
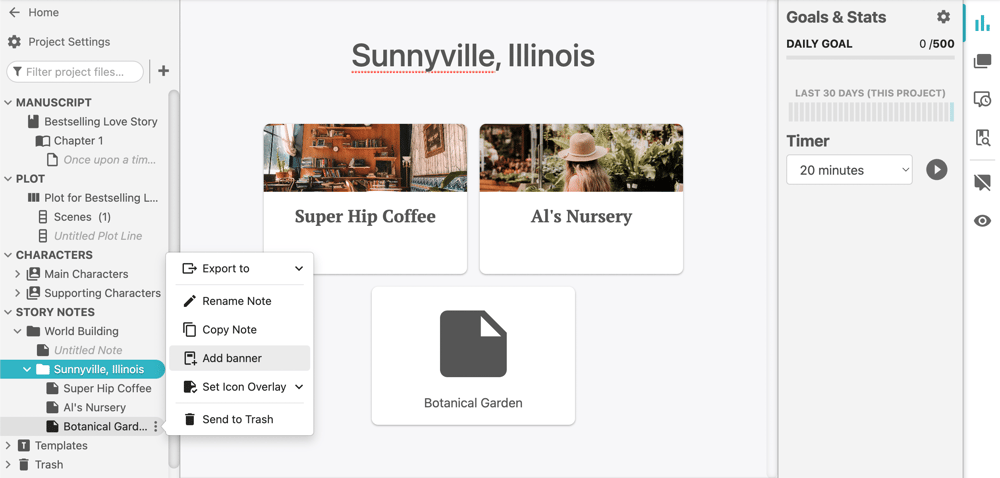
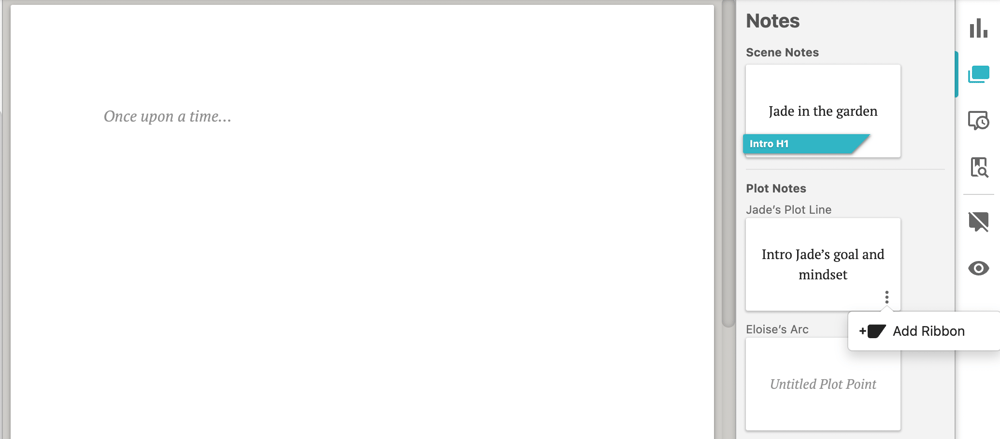
When you create a Story Note, you’ll see that you don’t have a banner like you do with character profiles. This gives you more flexibility to make the Note whatever you want it to be, and rest assured that if what you want is another banner, you can add one by clicking the three dots to the right of your note in the navigation menu.
Story Notes also give you the same editing options as character profiles. You can add property lists, dividers, images, or just start typing.
If you have maps and images that are essential for your worldbuilding, you can upload them to individual notes or add them to the corresponding folder as standalone files.
Once again, I personally like the idea of creating separate folders for locations in each of your love interests’ worlds as well as in their combined world. But you do you.
As for how to create heart-stopping romance settings, you’re not gonna believe this, but we’ve actually got an article on that, too. For now, I’ll just encourage you to ask yourself questions like:
- Where does each character feel the most like themselves?
- What kind of location would make them feel anxious, overwhelmed, or lost?
- What type of setting would inspire intimacy or force close physical proximity?
And as you fill out your Story Note for each location, think about:
- What that setting means to each character who inhabits it
- The emotions you want it to evoke for your reader
- How details within that setting might serves as symbols or highlight the theme
- Key sensory details that bring the location to life
One last quick note: you can use Story Notes for any and every part of your story planning process. Need to store research? Maintain a list of your readers’ favorite romance tropes? Create a catalog of themes and symbols? Make a new folder in your Story Notes. Simple as that.
Outline Your Love Story With the Plot Grid
This is where I get to introduce you to my dear old chum, the Plot Grid.
The Plot Grid is Dabble’s flagship feature, and it rocks. It looks like this:
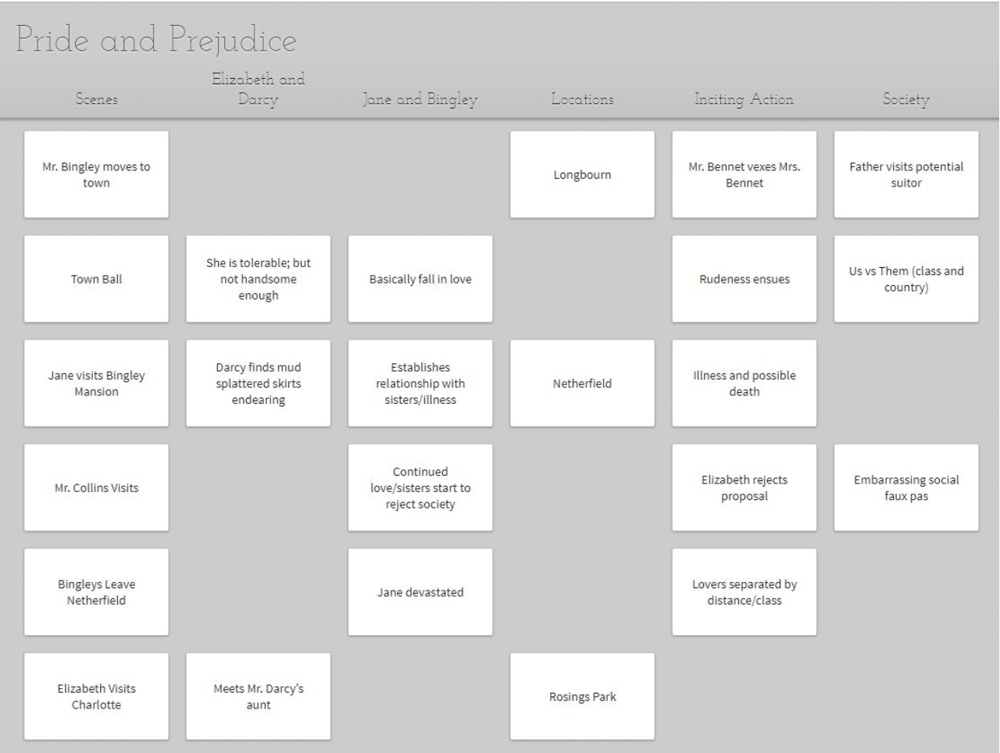
The Scenes column is fixed, but every other column can be whatever you want it to be. You can use the Grid to keep track of how your characters move forward on their journey in each scene, how often you use certain locations, the progression of subplots, and more.
This is a huge help for romance writers, because it makes it easy to juggle the character arcs that make this genre the emotional rollercoaster that it is.
Let’s build your magnificent Plot Grid step by step.
Filling Out the Romance Beats
My strength as a writer is in character, not plot, so I’ve loved that the Plot Grid helps me make sure I’m covering all my story beats and they’re in the right place. I used to do this by creating a column for story beats based on my chosen structure, like this:
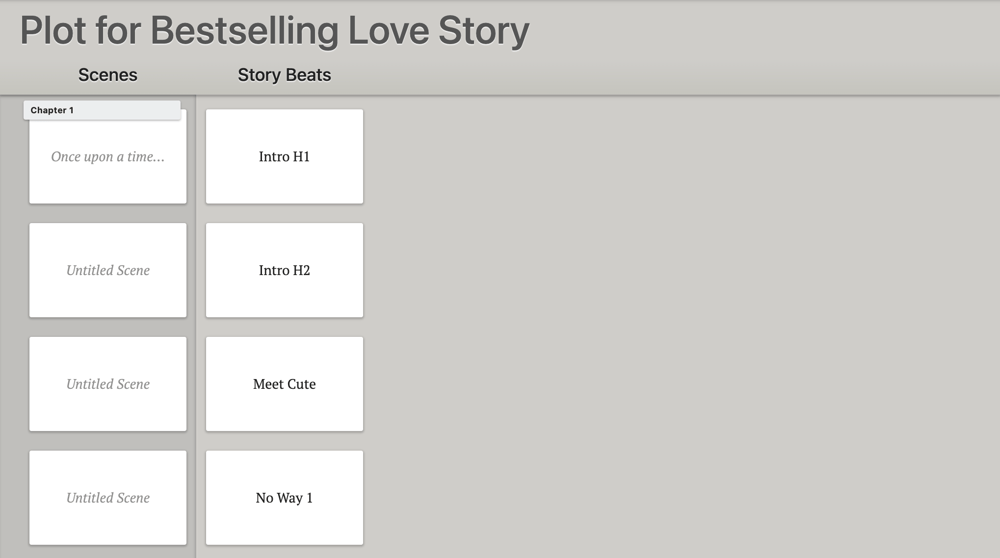
Then Dabble introduced Ribbons, and now I just tack Ribbons onto my Scene Cards like this:
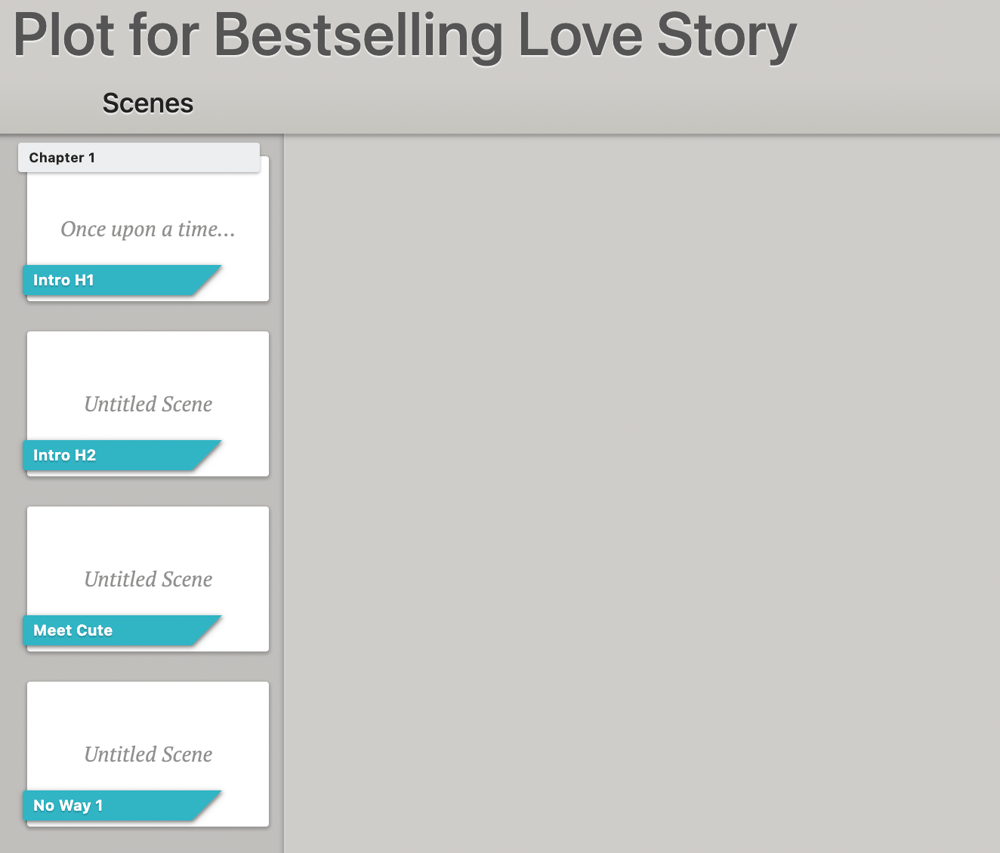
To add a Ribbon, hover over the Scene Card, and you’ll see three dots pop up. Click that, click “Add Ribbon,” select your color, and type whatever you want to type.

Little romance novel tip: this feature is also great for seeing the emotional progression of your story at a glance. You can use color coded Ribbons to indicate romantic tension, fear, falling in love, spice… whatever you want.
Now, the template I’ve linked to in this article follows Gwen Hayes’s Romancing the Beat structure. If you Google “romance beat sheet,” you’ll see there are a lot of ways to tell satisfying love stories. So if the exact Hayes approach isn’t your jam, no problem. It’s super easy to edit the template.
To add scene notes, just click on the Scene Card and you’ll get this:
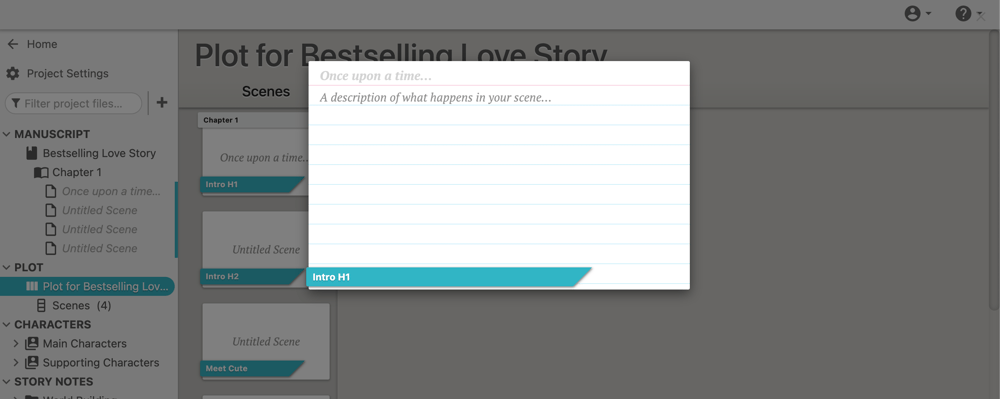
The words you type above the red line become your scene title in the Plot Grid. To return to the Grid, click on anything but the Scene Card.
Managing Subplots
Romance novels have a lot more going on than just “these people meet and then they fall in love.”
Sometimes the main characters have separate storylines that create subplots, like Shane’s journey of recovery and mentorship in Seven Days in June. Other times, a character’s independent plot line becomes part of the love story, like Jacob’s mission to convince his family he’s in a relationship so they’ll stop worrying about him in Yours Truly.
Then there are secondary character subplots, like Fizzy’s own romantic quest in The Soulmate Equation. (Hot tip: romance subplots often riff off whatever love-related theme the book is exploring.)
The magnificent thing about the Plot Grid is that you can track all your subplots in one place. Simply create a new column for each one. You can do this by clicking the three dots to the right of “Plot for [story name]” in the left-hand navigation menu and select “Add New Plot Line.” Or you can just hover over the blank space to the right of an existing Scene Card and click the plus sign to create a new Card, which automatically generates a new plot line.
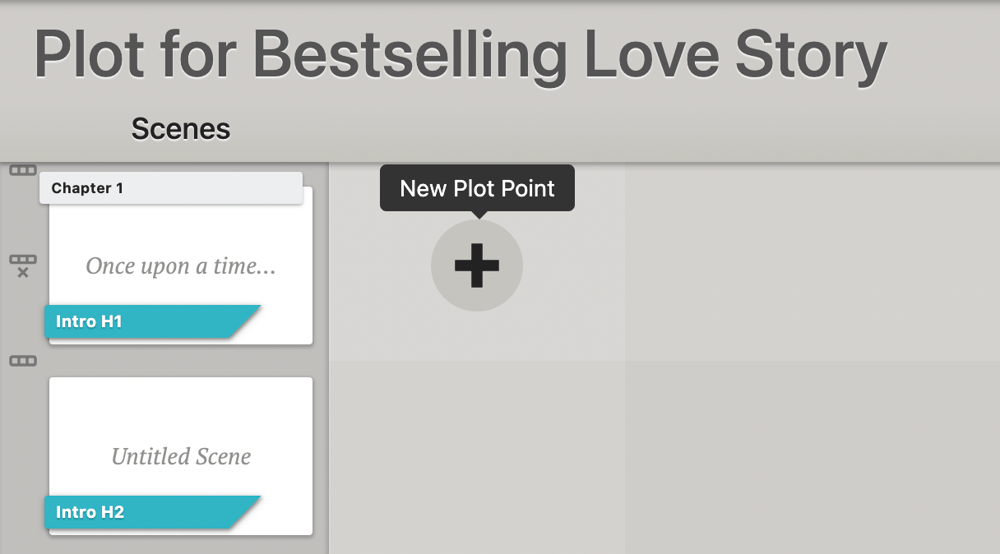
When you add a scene that furthers a specific plot line, create an additional Scene Card in the same row and in the corresponding plot line column. It looks like this:
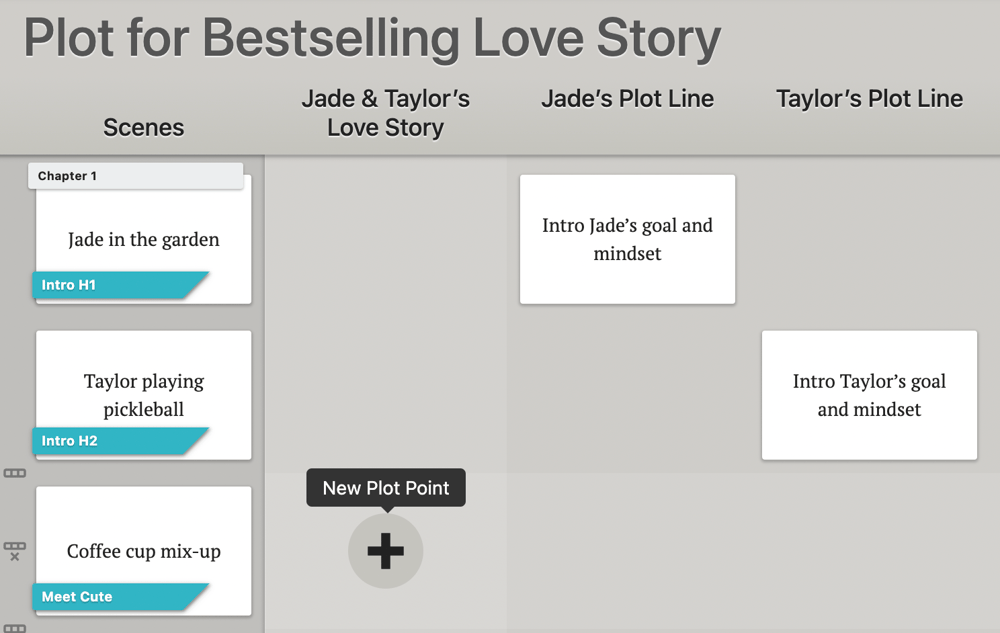
This allows you to see how each storyline progresses at a glance. You can check for loose ends and make sure nothing is rushed, stretched out, or completely forgotten about. It’s also a nice way to ensure all your scenes do something to move the story forward.
Adding Character Arcs
This is a romance novel, so you know your protagonist has to change. The love interest likely has an arc, too. Some of your secondary characters may even undergo some kind of personal evolution.
The Plot Grid is a great way to keep track of all these journeys. Lay out multiple character arcs the same way you created plot lines, like this:
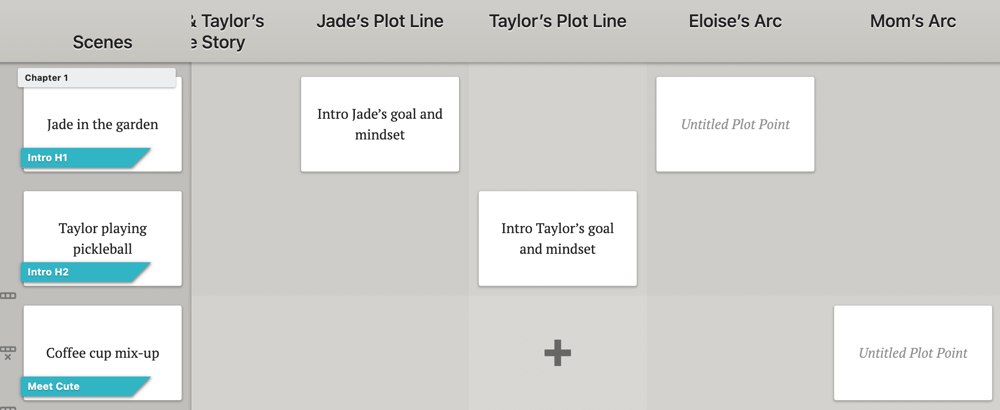
I love this feature for making sure my characters are steadily evolving and their transformations feel authentic. And, once again, it gives me a chance to check in and make sure every scene serves a meaningful purpose in the story.
Now, we’re only hitting the must-have romance novel elements in this article, but know that you can use the Plot Gid for anything. Create columns for locations and track where each scene takes place. Or dedicate a column to a specific theme and note every time a scene hints at or builds on that theme.
Even the template is yours to customize, so don’t hesitate to make it your own.
How to Use Dabble to Craft a Novel Romance Readers Will Swoon Over
Enough planning. Let’s get into the actual romance writing.
We’re about to explore all the fun features that will help you craft a stunning romance novel, but first, allow me to introduce you to your manuscript.
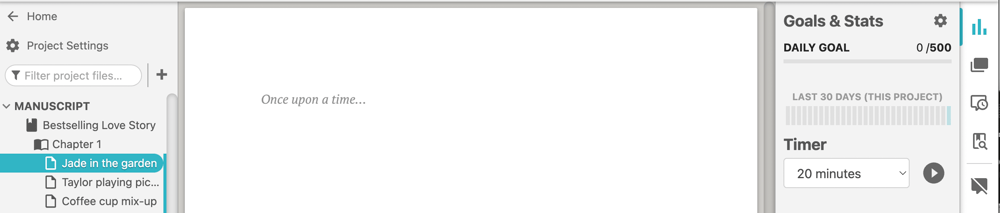
As you can see in the left-hand navigation menu, Dabble automatically creates an outline of your story as you create chapters and scenes in the Plot Grid.This allows you to navigate to any scene without scrolling through your entire draft. You can also drag and drop scenes to shuffle them around. And check this out:
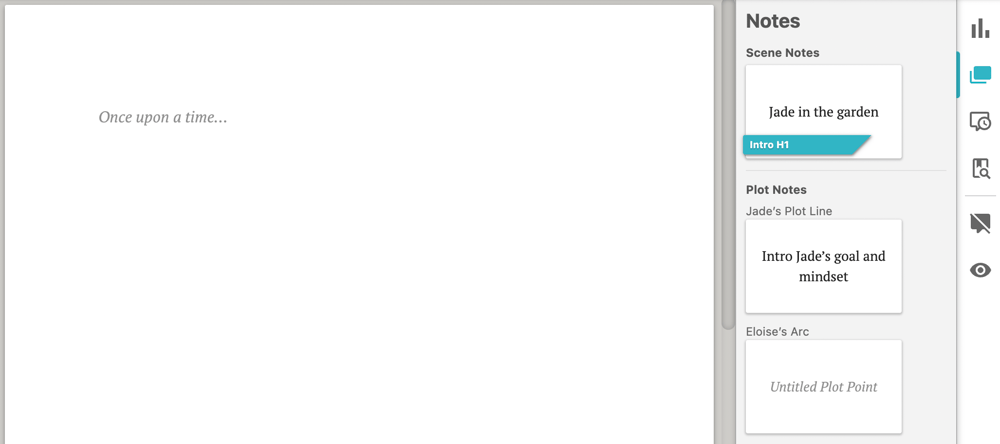
All the Cards you created for a given scene are now right at your fingertips as you write.
Now, what if you’re a pantser and don’t like to plan before you write?
Not a problem. The whole operation works in reverse, too. Go ahead and dive into your manuscript. As long as you establish scene breaks as you go, Dabble will automatically lay out corresponding Scene Cards in the Plot Grid. You can use that as a starting point to fine-tune your structure, plot line, and character arcs.
Now, let’s get to writing romance.
Build Chemistry and Romantic Tension
I don’t need to tell you that romance novels are nothing without a heavy dose of romantic chemistry and tension.
Fortunately, you’ve already laid the groundwork with solid character development, crafting characters who are destined to be together (and possibly get under each other’s skin, too).
Now, it’s important to keep in mind that when you write romance, your lovers need to be antagonists. Whether it’s an enemies-to-lovers situation or they’re “not in a good place for a relationship,” you want your romance readers to understand two things: 1) these characters belong together and 2) they’re ruining one another’s carefully laid plans.
Pulling off this dynamic requires an artful push-and-pull throughout your romance novel. You want to create conflict, build tension, offer glimpses of budding attraction, sweep everybody off their feet, blow it all up again… you know the drill.
Even with the most meticulous planning, you might discover a brilliant opportunity for an argument, moment of connection, or sexy dialogue as you write. This is where Ribbons come in handy. You see, you can add a Ribbon to a Scene Card from inside your manuscript.
This allows you to color-code the emotional journey as you go so you can see the highs and lows at a glance in your Plot Grid.
Write Engaging Dialogue
The pressure’s on when it comes to writing dialogue in romance novels. You’ve got to create a conversational connection dizzying enough to convince your readers that these people are falling in love. And the line between charming and cheesy can be pretty thin.
For help sharpening your dialogue skills, I recommend checking out How to Write Dang Good Dialogue and How to Write Realistic Dialogue for Literary Eavesdroppers.
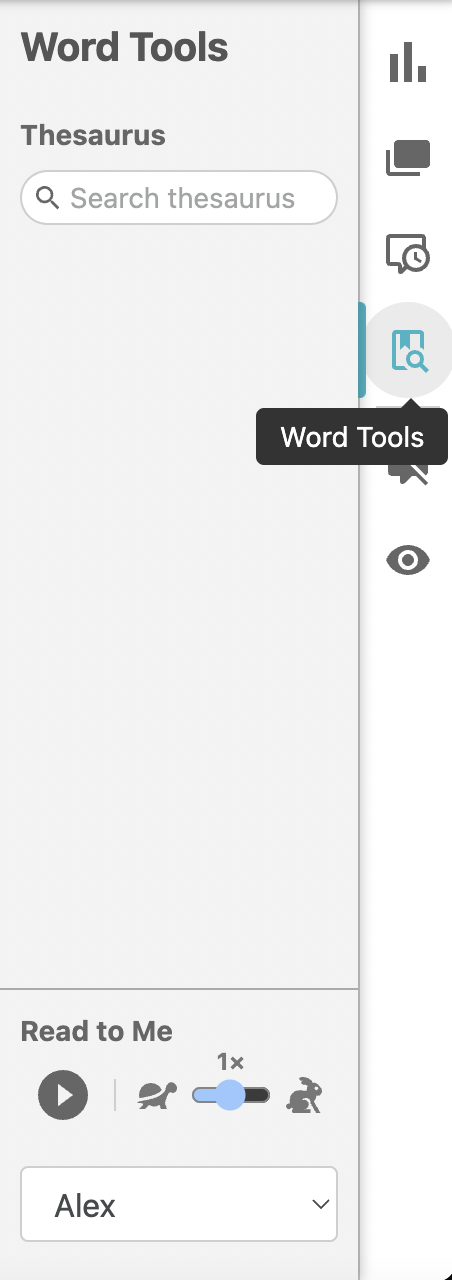
I also recommend making use of Dabble’s Read to Me feature. You can select from several different voices (little tip: the Google options sound most natural) and even adjust the speed.
This allows you to close your eyes, listen to the words, and find out if they make you swoon.
Craft Vivid Descriptions
If you want to write a romance novel, you’ve got to know how to paint a picture, whether it’s a bookshop in a snowstorm or a perfectly sculpted clavicle.
In this genre, just like any other, the “show, don’t tell” principle applies. Draw your reader in with concrete details that set the mood; don’t just tell them that the falling snow was romantic or the clavicle was attractive. Bring them into the experience.
Engaging all five senses is key. Acknowledge scents, tastes, sensations, and sounds—not just sights. And if you find yourself at a loss for words, guess what? You can click this little word tools icon to access Dabble’s built-in thesaurus:
How to Revise Your Romance With Dabble
Once you’ve written your first draft, it’s time to revise. If you’ve ever self-edited an entire novel before, you know the process gets messy. I suspect you also know what I’m about to say:
Dabble can help you tame the chaos.
Check Your Spelling Grammar, and Style
It may not surprise you that Dabble has a built-in spelling and grammar checker. Most novel writing apps do (though not all, surprisingly).
What you may not realize is that Dabble’s built-in editor covers spelling, grammar, and style. It’s also powered by ProWritingAid, which is a leading AI editing program and pretty impressive tool in its own right.
That said, if you’re already attached to a different grammar extension (or a more comprehensive version of ProWritingAid), you can use your preferred tool with Dabble as well.
Use Highlighting to Color-Code Problem Areas
I don’t recommend immediately picking at your first draft as you read it through for the first time. That first read might reveal larger issues that require you to rewrite entire scenes—a major bummer if you just spent three hours perfecting the prose of a section you ultimately have to delete.
This is why I do a ton of color-coded highlighting. Designated colors refer to issues that come up often, like:
- You just used this word
- Rework this sentence
- Make sure this is accurate
- Replace with something more specific (Pretty much all my first drafts contain at least one line of dialogue that’s literally just “Jokey joke-joke.”)

Of course, you can use highlighting for whatever you want. I just love this strategy because it allows me to tag an issue and move on quickly without losing the thread of the story or worrying that I’ll miss that error later.
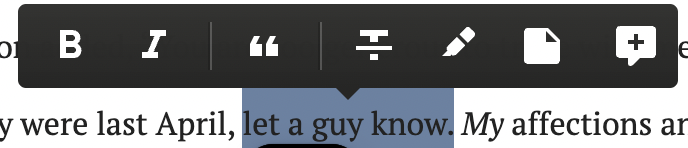
To use this function, highlight a portion of your text and a handy little toolbar will pop up. Select the highlighter icon, pick a color, and you’re done!
That said, some problem areas require more detailed reflection than a single color can deliver. In that case…
Leave Yourself a Note
Dabble gives you two great ways to talk to yourself within your manuscript.
One is through comments. Highlight the section of text you want to comment on, and when the toolbar pops up, select the speech bubble icon. A comment box will open so you can leave your thoughts right there for your future self.

This function is also super handy if you work with a co-author. (Dabble allows real-time collaboration on a single project, by the way.)
You can also leave yourself a sticky note—basically a virtual Post-It note in the middle of your manuscript. I use this feature for really broad notes that concern an entire section, like “Needs more romantic tension.”

To slap a Sticky Note somewhere, highlight a section text and select the icon that looks like a square with a folded edge.
Share With Beta Readers
Once you’ve done a few rounds of editing yourself, you’re ready to share your work with beta readers and critique partners. There are a few ways you can do this.
One is to export your manuscript as a Microsoft Word document or text file. To do this, click the three dots to the right of your book title under the “MANUSCRIPT” section. Select “Export To,” then choose your preferred file type from the dropdown menu.
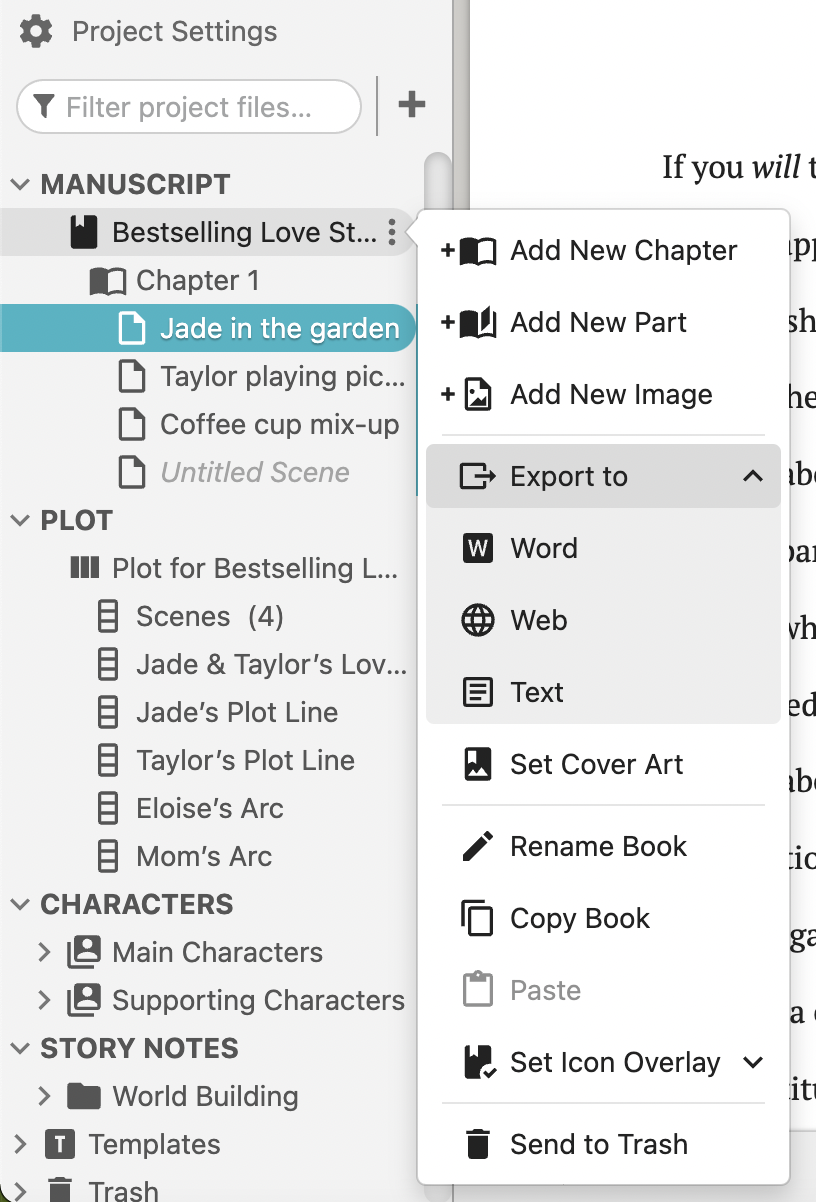
(Fun fact: if you eventually choose to submit your manuscript to agents and publishers, Dabble can export it as a Word file already formatted to industry standards.)
Another option is to export to the web, which creates a link you can share with your readers so they can see your manuscript without a Dabble account.
Finally, if you have a reader who does have a Dabble account, you can invite them as a co-author. Just know that this gives them access to the entire project and would allow them to edit it and leave comments. You can find this option under project settings.
Ready to Get Going?
Those are my best tips for using Dabble to write a romance novel. But honestly, one of the things I love most about this tool is that it’s so easy for each writer to make it their own.
As you play around with my template (which you can find here), you’ll probably discover your own preferences or find new, genius strategies for making the most of what Dabble has to offer.
If you’re not already a Dabbler, I invite you to give it a try. A free trial gives you access to all its features for free for 14 days. You don’t even have to enter a credit card to get started. And now that you’ve finished this article, you don’t need a tutorial, either.
Ready to write your romance novel with Dabble? Click here to start your free trial.
SHARE THIS:


TAKE A BREAK FROM WRITING...
Read. Learn. Create.

Conflict. It’s the lifeblood of any story. Without it, all you’ve got is a bunch of people wandering around aimlessly. Conflict is the source of tension, excitement, suspense, and drama. It drives your plot, gives your characters motivation, and sometimes allows you to hold up a mirror to the world.

You want to know how to write an adventure story—the kind of heart-pounding saga that keeps readers up until the wee hours, whispering, “Just one more chapter,” until their eyes dry out. Well, this is how it's done.

Maybe you've heard of foil characters before, but what exactly do these types of characters do? How can you make a good one? Don't worry, we cover everything you need to know about foil characters in this article.