How to Write Historical Fiction With Dabble (Guide + Template)

Writing historical fiction is a task that gets more complicated as you go. Maybe you start with a historical event and a mix of real and fictional characters. You research the time period, plot your story, and start typing.
By page two, you realize you have no idea if your protagonist’s taffeta dress is historically accurate. Three pages later, you’re wondering if the word “shucks” was around back then. Before you know it, you’ve got a whole new list of things to research and you’re only on chapter two.
Historical fiction writers have to manage characters, plot lines, settings, and themes just like every other author. But they have the added challenge of accurately depicting a time period that has long since passed.
The good news is that Dabble is a pretty spectacular tool not only for planning, plotting, writing, and revising a novel but also for organizing research and adapting on the go.
Whether you’re already a Dabbler or exploring tools to make writing historical fiction a little easier, stick with me. I’m about to introduce Dabble’s handiest features for historical fiction writers. You’ll learn:
- Why Dabble is the ideal writing tool for this genre
- How to use Dabble to organize your research
- How to craft authentic historical settings with Dabble
- How to use our character development tools
- Why Dabble’s plotting tool is so great
- How to draft and edit a story in this program
- How to use Dabble to quadruple-check your novel for historical accuracy
Just to make this process even breezier, here’s a free historical fiction template you can use. (If you don’t have a Dabble account yet, you can access the template by signing up for a free 14-day trial, no credit card required.)
Now, let’s kick this thing off with a quick chat about historical fiction as a genre.
The Basics of Writing Historical Fiction
A great historical novel connects readers to the past in a deeply personal way. This genre has the power to turn names and images in history books into flesh-and-blood human beings. It invites readers to see themselves in history.
But man, is it work. To write historical fiction that resonates, you have to craft relatable characters and conflict. At the same time, you’re burdened (and blessed) with the task of bringing bygone eras and long-dead human beings to life accurately.
This genre also requires you to pull from your imagination, brazenly blending fact and fiction. As you develop each character’s voice, personality, and daily life, you have to consider both the role they play within your story and the influences of their historical time period.
It’s a lot, is what I’m saying. Dabble can help.
Using Dabble to Write Historical Fiction

If you’re not familiar with Dabble, here’s the short version:
Dabble is an all-in-one writing tool that helps you stay organized and on task in every phase of the process. It has innovative features for plotting, planning, writing, revising, and even formatting your historical fiction novel.
Why Use Dabble?
What makes Dabble particularly great for writing historical fiction is its versatility.
This tool has a ton of built-in structure so you don’t have to think too hard about your organization strategy. However, there’s still plenty of room to customize the system to meet your exact needs, whether you need to plot a story in multiple timelines or manage enough characters to populate Genghis Khan’s army.
Plus, this program works on any device, online or off, so you can tackle your historical fiction project anytime, anywhere.
I could say more, but I’d rather just show you how to write historical fiction with Dabble.
Getting Started
To start a new project in Dabble, just click that clever little plus sign on your home screen:
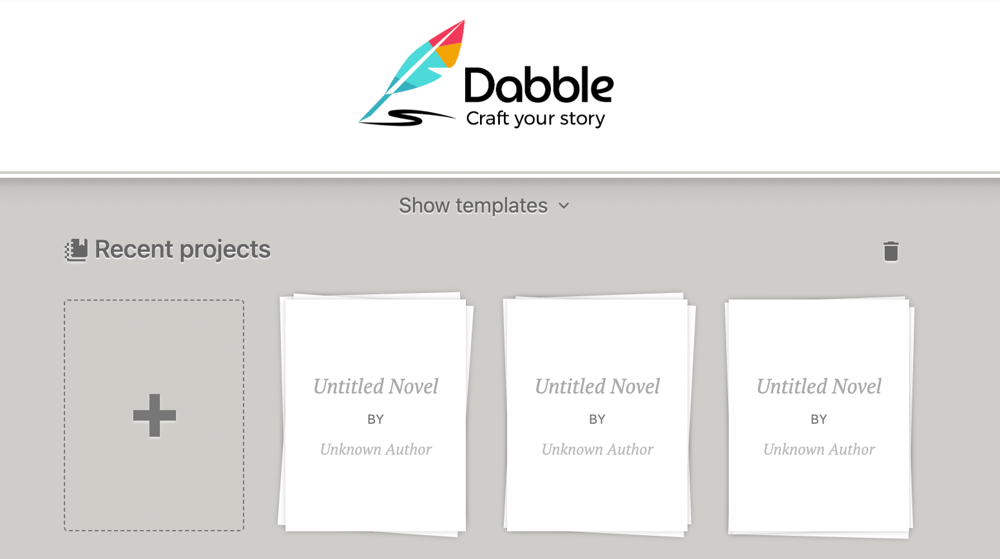
That’ll take you straight to your project page.

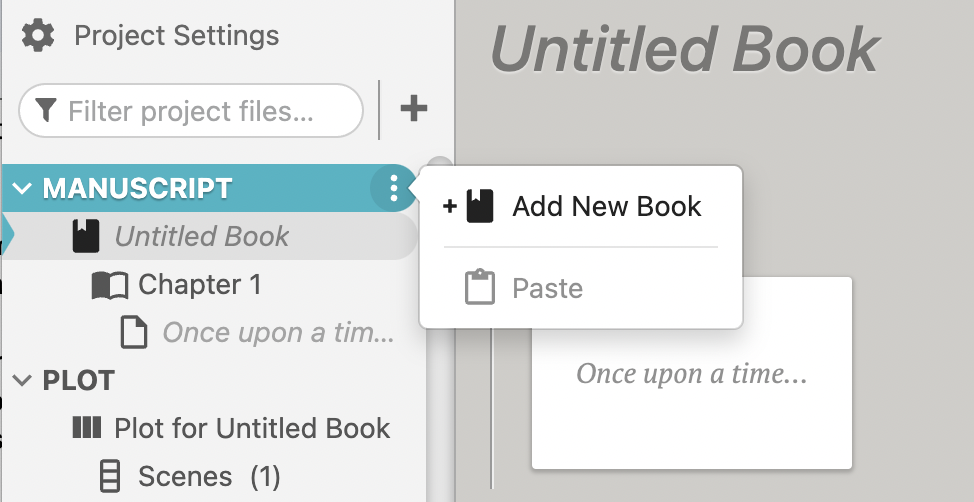
Click on “Project Settings” in the top left-hand corner to create a name for your project, fill out author information, invite a co-author, adjust your formatting, and more.
When you exit out of Project Settings, you’ll return to your title page, where you can fill out your book details.
Little tip: if you plan to write a historical fiction series set in the same world, you can add multiple books to the same project so all your research and notes are in one place. To add a book, click the three dots to the right of “MANUSCRIPT” in your left-hand navigation menu.
Now, if you’re the goal-setting type, go ahead and click that li’l Goals & Stats icon at the top of the right-hand navigation menu.

Then click on Goal Settings.
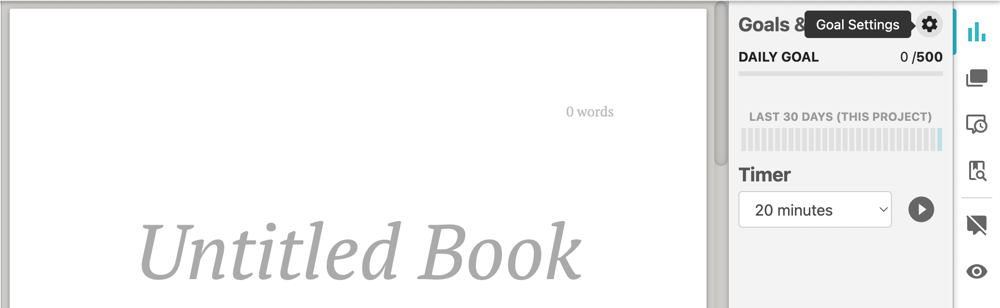
That’ll bring you here:
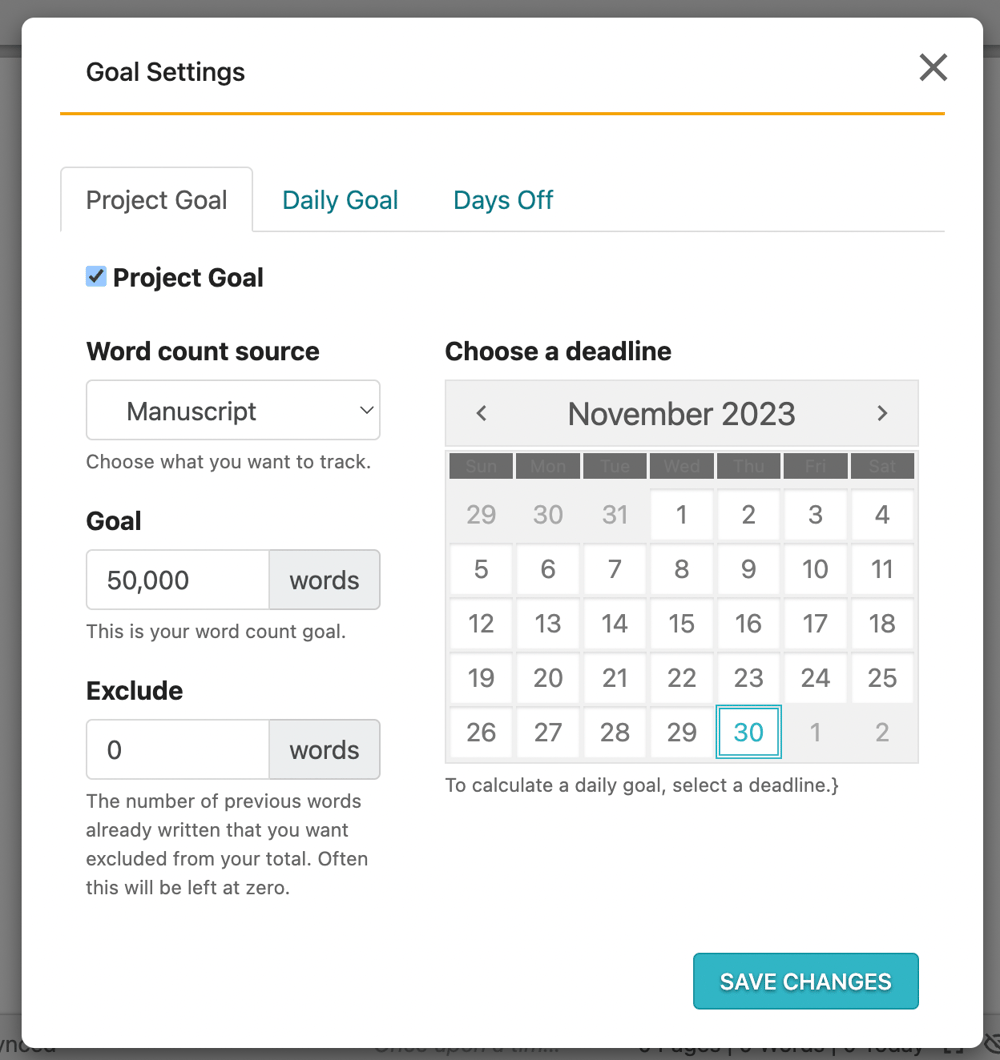
…where you can set a deadline, project word count, days off, and more. Dabble takes all the information you feed it and creates a daily word count goal. Neat, right?
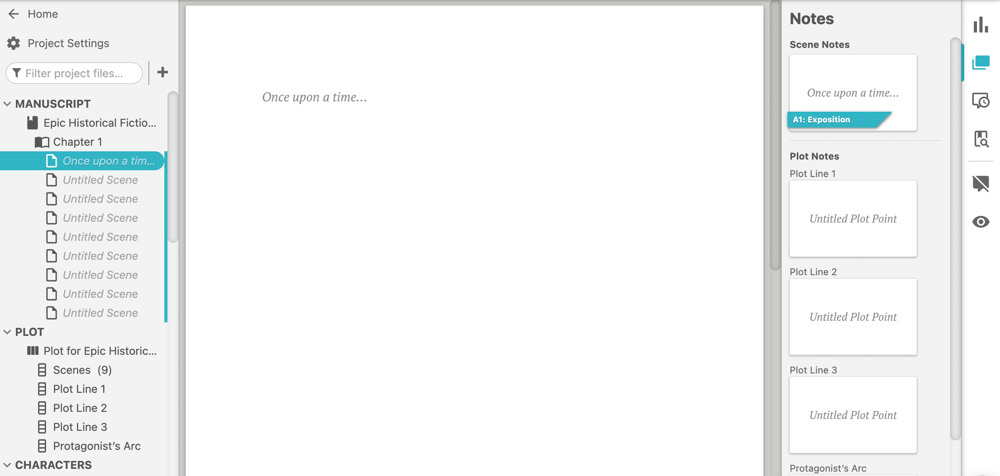
Introduction to Story Notes
I’ll introduce you to a ton of cool features as we continue through this guide, but we’ll be using Story Notes a lot, so let’s do a quick tour of this tool up front.
Story Notes is essentially a system of folders and files you can use to store and organize… well, anything. You can manage your historical settings, keep track of research, do writing exercises, and more.
To create a new folder, click the three dots to the right of “STORY NOTES” in your left-hand navigation menu.
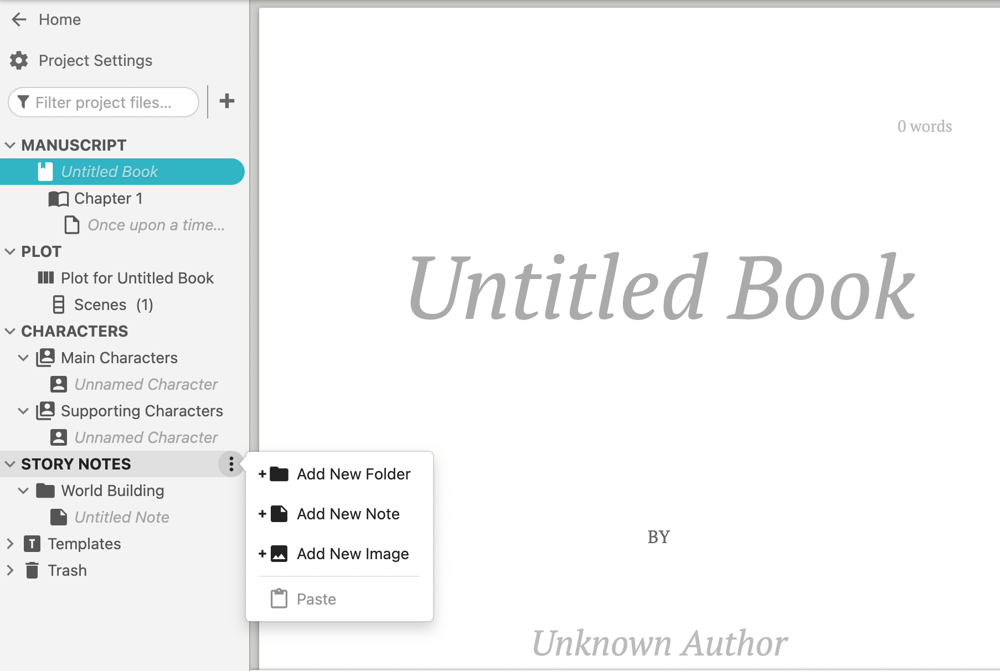
To add an individual note to a folder, click the three dots to the right of the folder name.
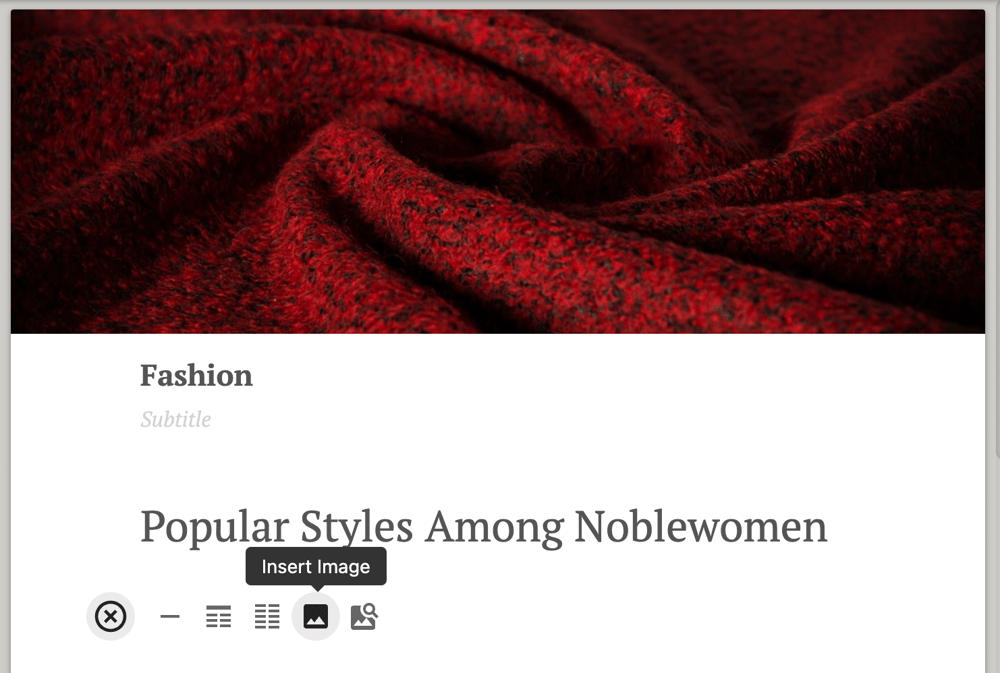
You may have noticed that there’s also an option to add an image. Dabble allows you to add images to notes or upload them as independent files.
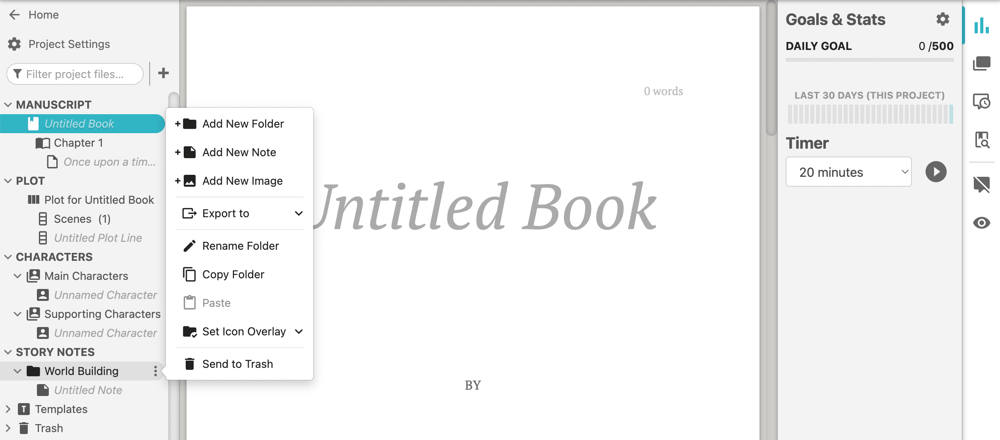
If you’d like to dress your notes up a bit, you can click the three dots to the right of the note in the navigation menu to add a banner.
Inside the note, you can either upload an image for the banner or use Dabble’s built-in image search (powered by Unsplash). You can also add headings, property lists, section dividers, and more.
This is just one example of what I mean when I say Dabble can be whatever historical fiction writers need it to be. You have the power to organize your ideas your way.
Managing All That Historical Research
I can’t tell you how to organize your research for your historical fiction story. So much of it depends on the needs of your novel.
If you’re writing a book set during the American Civil War and told from the perspective of a mother with two sons enlisted, you might create a single note titled “Major Battles” and store it in a “Military Life” folder so you have enough to pull from to write the sons’ letters from the warfront.
But if your historical fiction story is set in the same time period but follows a Union Army general, each battle might warrant its own note inside a “Battles” folder inside a “Strategy” folder inside a “Military Life” folder.
One suggestion I can offer is to keep a running list of questions to research. If you’d like, you can create “Questions” notes for multiple categories and keep one in each folder. But it might be handy to just have one master list that’s easy to access without having to dig, like, six folders deep. That way, you can quickly add questions on the fly.
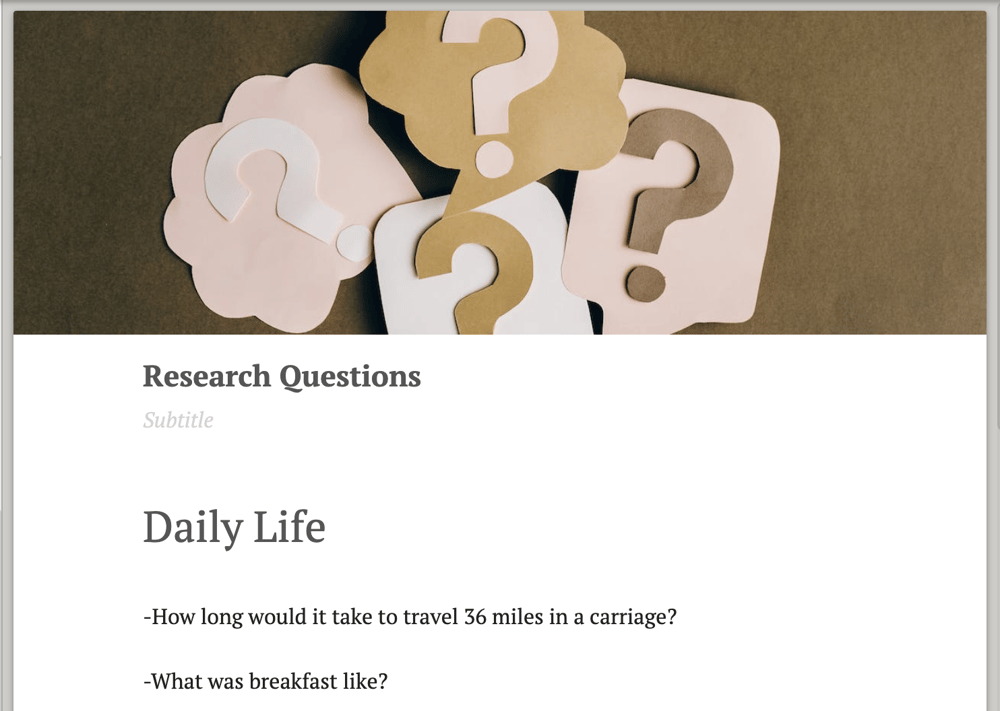
Thanks to the property lists feature, it’s still a breeze to keep your questions organized even within a single note.
And don’t forget that you can upload maps and images to your research folders. Dabble also allows you to link to other sources on the web so you can easily access articles, videos, and galleries that might inspire your historical novel.
What to Research When Writing Historical Fiction
So what types of things should you be researching as you plan your novel?
Once again, it depends entirely on your story. But here are a few broad categories that are essential for pretty much all historical fiction:
- Physical setting
- Economic structures
- Political context
- Religious context
- Societal values
- Daily life
- Pop culture
- Architecture
- Technology
- Food
- Fashion
- Slang
- Relevant historical events
- Relevant historical figures
For more tips on researching historical fiction, check out this article.
Crafting Authentic Historical Settings With Dabble
Now we confront the massive task of bringing a historical setting to life for modern readers.
No problem. Total breeze. We got this.
Now, you may have already noticed that there’s already a folder named “World Building” in your Story Notes. This is a great place to start organizing the details of your historical setting.
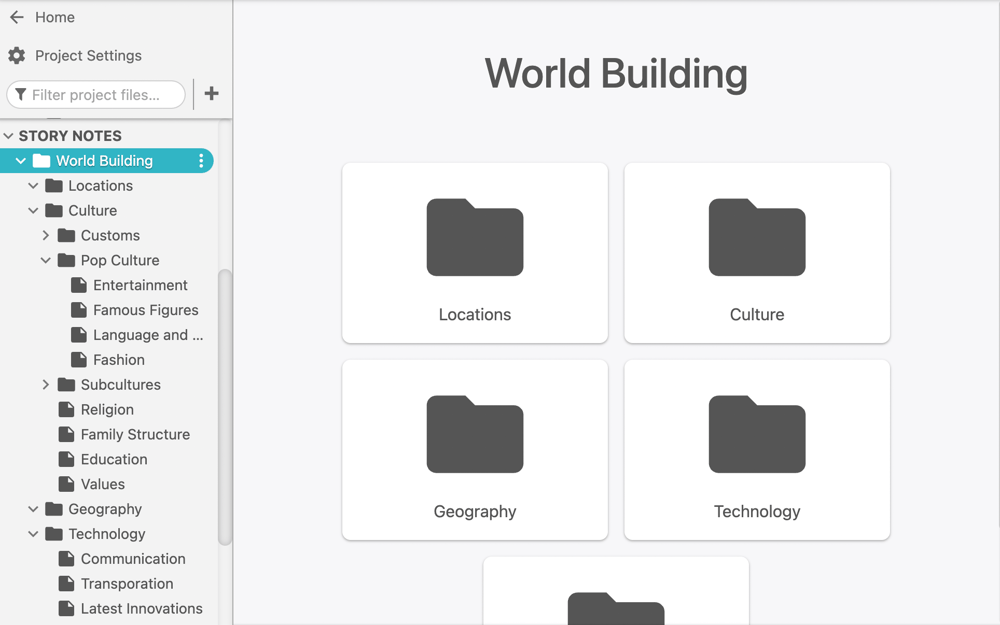
Hot tip: you can copy and paste existing notes by clicking the three dots to the right of the note in your navigation menu. I love this feature because it saves you from having to decide if you want to file your notes on 16th century tea house design under “Research” or “World Building.”
Once again, you know best when it comes to the right way to organize the notes for your setting. But I can at least offer some tips on the high-level categories you’ll want to explore.
You can also check out this article for more guidance on creating an engaging setting for your historical fiction story.
Historical Context
While we often think of the “where” when we talk about developing the world of a novel, historical fiction writers know all too well that time period does just as much to define the setting.
If you’re a minimalist, you may find that you just want to leave all your notes regarding your story’s historical context in your research folder. That said, it might be useful to create a folder dedicated to the time period under “World Building,” creating a space where you can consider this era as it directly influences your characters’ day-to-day lives.
You can use subfolders and notes to explore not only the physical realities of the time—things like technology and fashion—but also cultural norms, taboos, and class dynamics. This is also a good place to explore the societal effects of major historical events.
Physical Locations

I’m a big proponent of creating a folder for a larger geographical location—like a city—and filling it with individual notes for smaller settings. This just makes it easier to envision the world as the characters experience it, filled with all its familiar houses and shops and sanitariums.
If your setting includes a real historical building or location, you might already have extensive notes on the place in your Research folder. Your World Building folder is a great place to start jotting ideas on the role this location plays in your novel.
Is this place special to one of your characters? Does it symbolize society in some way? Does it foreshadow disaster?
Hot tip: You can link between notes to avoid copy-and-pasting the same details in multiple places. For example, you can link to your research on a location from within a World Building note just by typing “@” followed by the note you want to link to.
Cultural Context
This category overlaps a bit with the historical context; time period inevitably influences culture.
But even though history is the star in this genre, it’s not the only defining element in your characters’ world. Your story’s cultural context also includes details like geography, ethnicity, language, religion, and class… and all the norms, taboos, values, and expectations that come with them.
Your novel may even feature characters for whom the majority culture is different from their family’s way of life. Or your historical fiction story might explore multiple subcultures.
Good thing you’ve got Story Notes to keep all this straight.
Character Development in Historical Fiction
Now it’s time to dream up some characters. Remember, these folks essentially humanize the past for your readers, so they need to feel like real, complex people.
As you probably expect by now, Dabble’s got some great tools for bringing your characters to life. Let’s take a look.
How to Create Casts
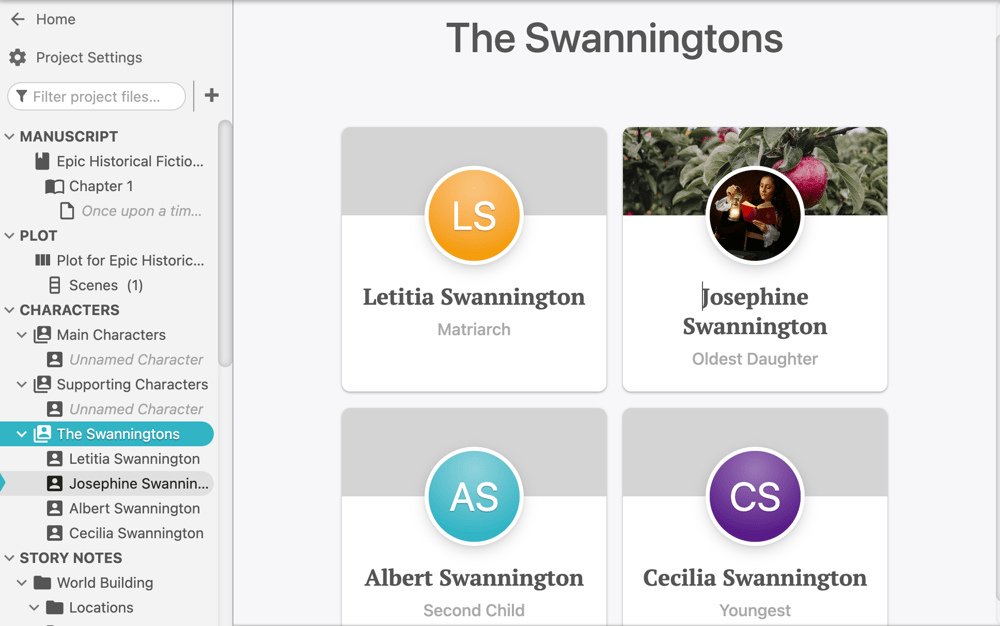
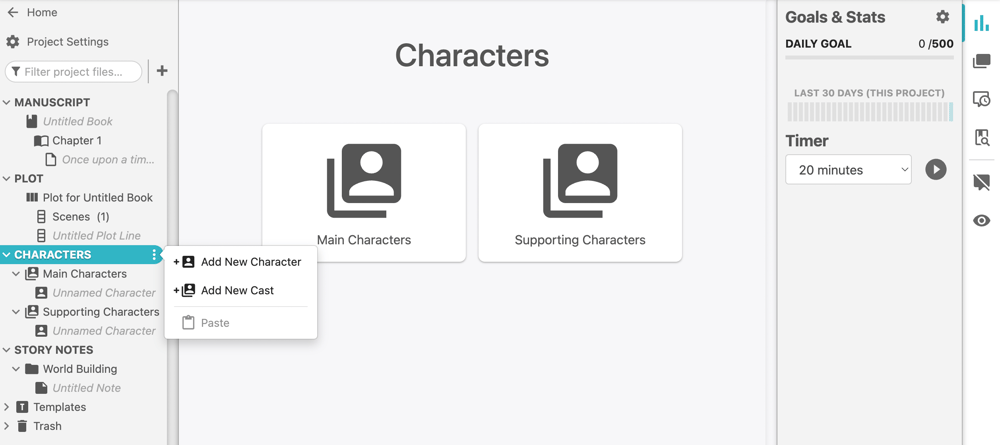
You can create separate casts to group your fictional friends into categories. When you create a new project in Dabble, you already have two casts in your “CHARACTERS” section: Main Characters and Supporting Characters.
You might wish to set up additional casts depending on the needs of your historical novel.
If your story spans generations, you could create different casts for different time periods. If your story involves war or uprisings, you might organize characters according to their affiliations. You could create casts according to family connections, social circles, love stories, or any other grouping that makes sense to you.
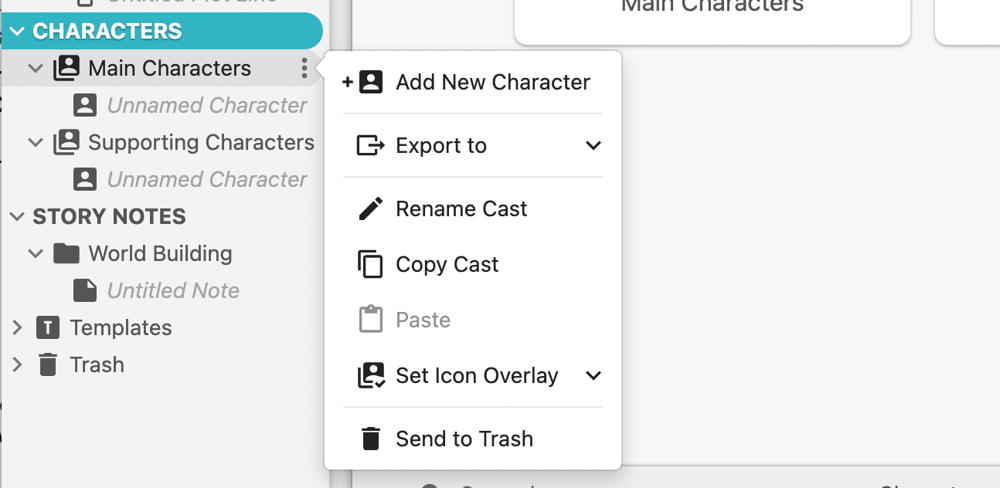
To create a new cast, click on the three dots to the right of the word “CHARACTERS” in your navigation menu. Select “Add New Cast.” Easy peasy.
How to Create Character Profiles
To add a character to a cast, click the three dots to the right of the cast name and select “Add New Character.”
If you don’t want to put the character in a cast and just want them sitting all free and loosey-goosey, find the “Add New Character” option by clicking the three dots beside “CHARACTERS.”

A character profile looks very similar to a Story Note except that it already has a banner and a spot to upload an avatar. You’ve got all the same editing options, including property lists, headers, and image upload/search.
What You Need to Know About Your Historical Fiction Characters
Now that you’ve created these character profiles, what kind of information should you fill them with?
We actually have a whole guide on how to write historical fiction characters. So we’ll stick with the basics in this article.
All the standard rules for crafting compelling characters apply. You need to nail down details like:
- External goal
- Internal conflict
- Motivation
- Backstory
- Fears
- Flaws
- Weaknesses
- Strengths
- Demographics
- Quirks
- Values
- Appearance
Basically, your historical characters need to feel human, fully fleshed out, and relatable to modern readers.
That said, they’re still historical folks living in a historical world. Make sure their setting is reflected in who they are. Do they hold any power in this world? What do they value, and how do those values line up with their society’s expectations? How would they talk?
Finally, if you’re writing about an actual historical figure, that particular profile will probably be a mix of fictional details and actual facts.
I recommend creating the profile of this character as you plan to write them, then link to the folder or note where you have all the facts you gathered in your research. You might also consider bolding or highlighting the accurate historical details within their profile. It’s okay to blur the lines of reality when writing historical fiction, but it’s important to know when you’re doing it.
Plotting a Historical Fiction Novel
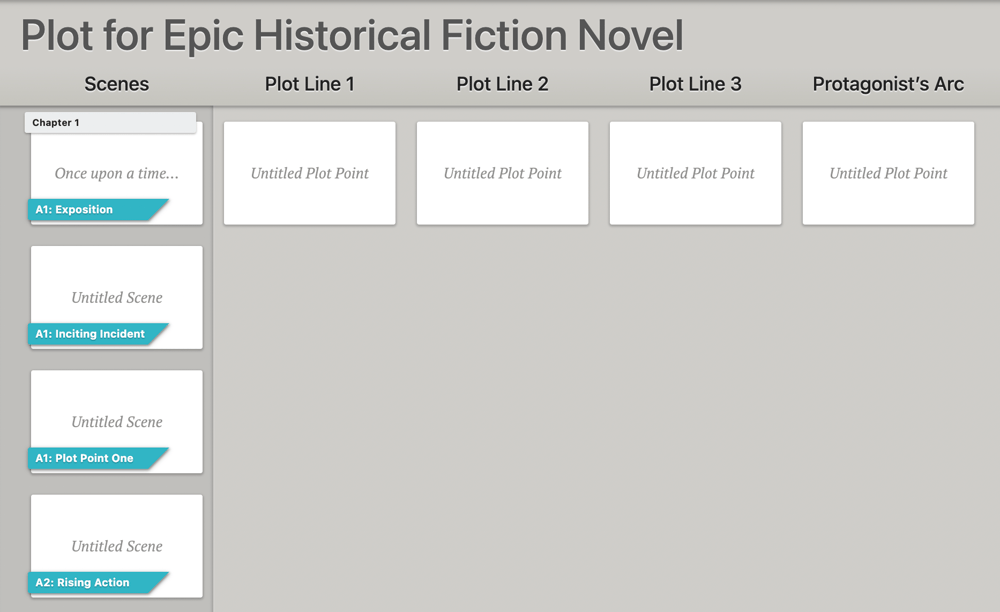
Okay, time to plot your novel. Allow me to introduce the Plot Grid.
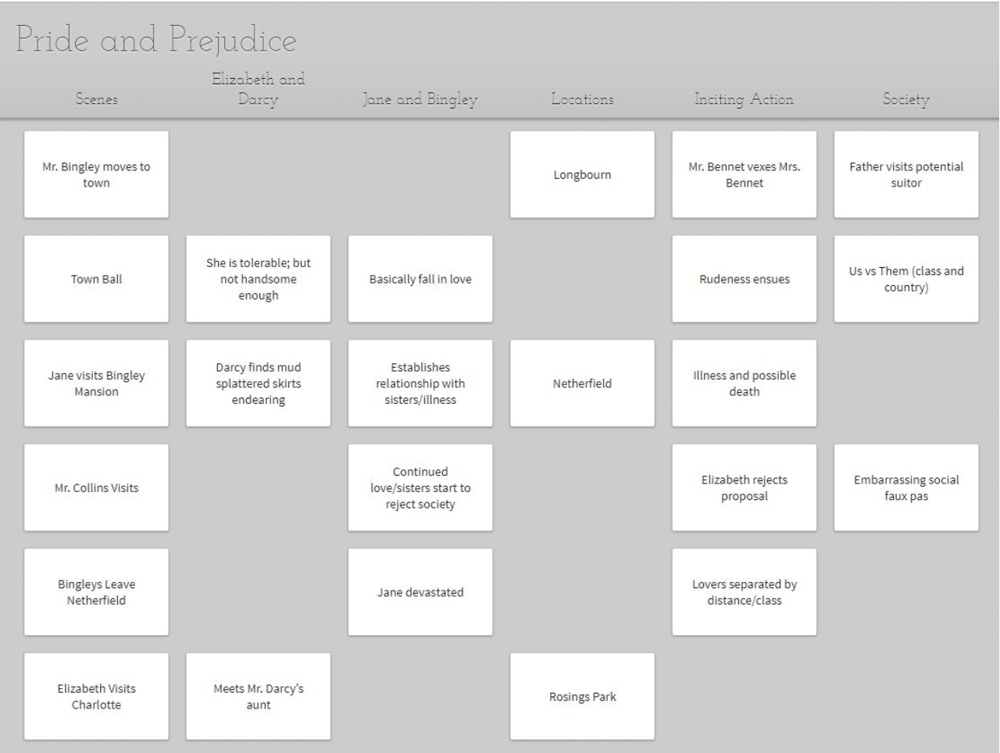
This super rad feature allows you to see the progression of multiple plot lines, character arcs, and scenes throughout your novel. You can also use it to track themes, symbols, the passage of time… whatever you want.
See, the Scenes column on the far left is where you plot your scenes in the order in which they appear in your novel. But all those other columns? Those are whatever you want them to be.
If, for example, you want to make sure your protagonist’s arc is steadily progressing over the course of your story, you can create a column dedicated to that arc. Every time a scene furthers the arc, you create a card indicating that growth in the corresponding column and row.
This makes it 1,000 times easier to catch plot holes, weak arcs, loose ends, unjustified character decisions, and a host of other story blunders.
Now let me show you how to set this thing up.
Setting Up Your Story Structure
I like to start by creating a story structure guide so I can make sure I’m hitting all my beats. You can do that by adding a column for the structure like this:
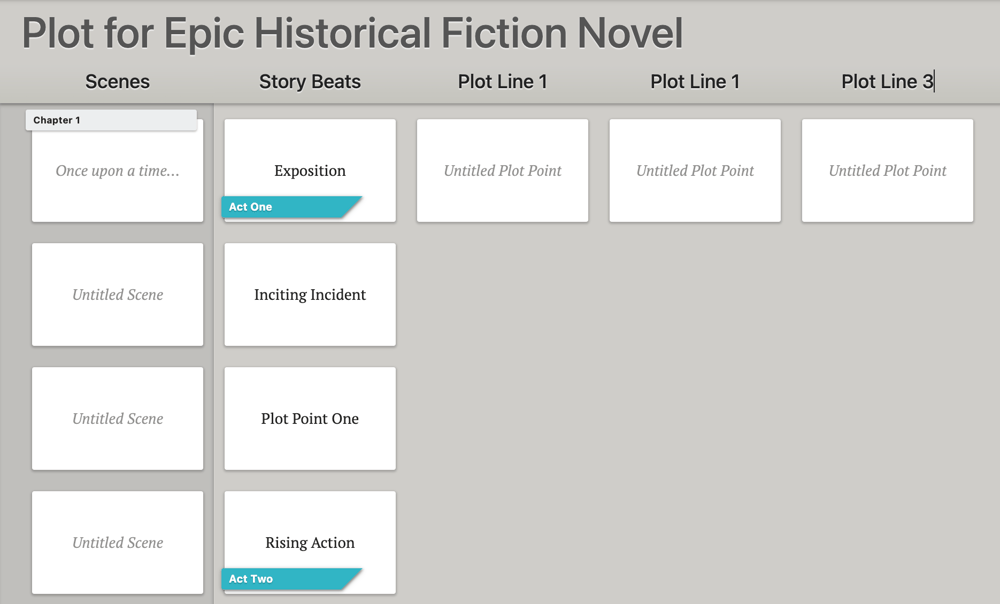
Or by adding Ribbons to your Scene Cards, like this:
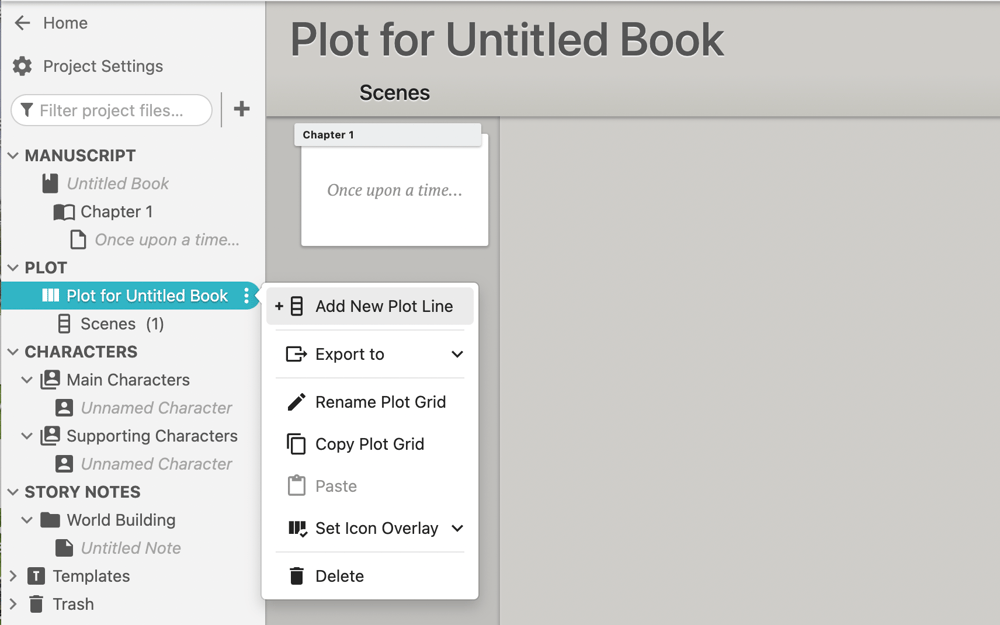
To add a column, you can either hover over the space on the Grid where you’d like to add a new card and click the plus sign or click the three dots beside “Plot for [Book Title]” in the navigation menu and select “Add New Plot Line.”
To add a Ribbon to a Scene Card, hover over the card, click the three dots that appear in the lower right-hand corner, and select Add Ribbon.
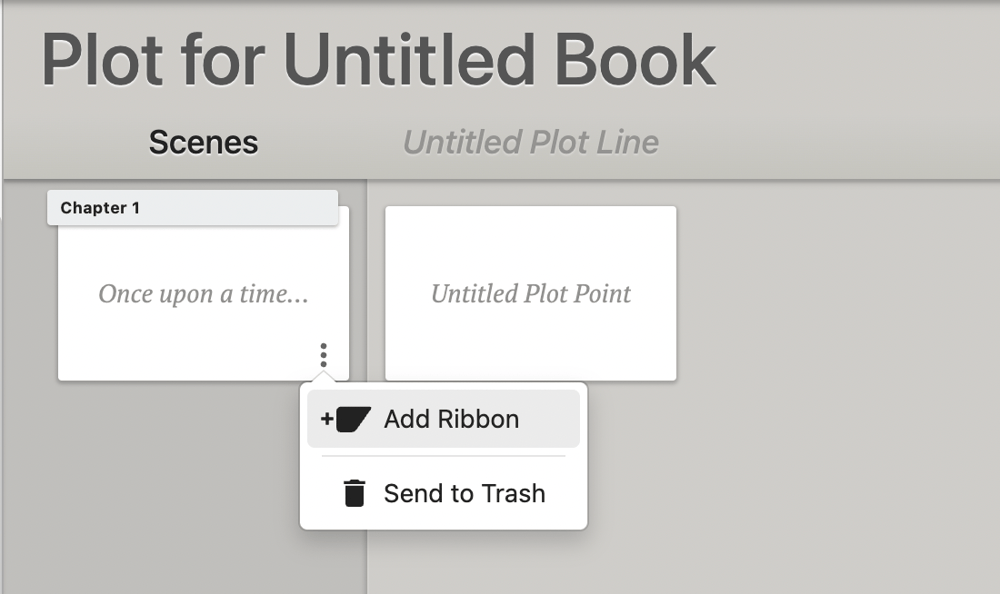
Side note: Ribbons can serve a multitude of functions in your Plot Grid. Color-code them to track multiple timelines, emotional pacing, and more.
In the historical fiction template I linked to in this article, you’ll see that the Plot Grid is already set up with the three-act structure. This is the most popular story structure and is super common in historical fiction. But if you prefer a different format, the template is customizable. Change it up however you wish.
Filling Out Scene Cards
To add notes on a scene, click on the Scene Card and you’ll get this:
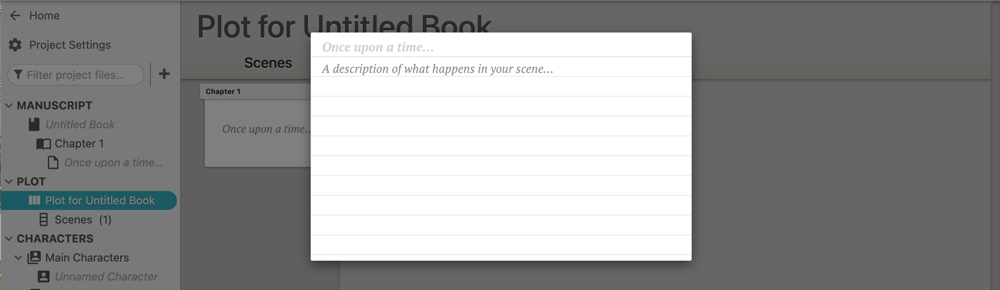
You can fill this little puppy in to your heart’s content. Whatever you put above the red line will be the scene title that’s visible on your Plot Grid.
Now that you’ve planned the heck outta this story, we’re ready to talk about how to write historical fiction with Dabble. Woo-hoo!
Tools for Writing and Editing Historical Fiction
As you created the plot for your historical fiction story in the Plot Grid, Dabble went ahead and generated a little outline under “MANUSCRIPT” in your navigation menu.
Click on any scene in that outline and you’ll land on the corresponding scene in your manuscript. You can even shuffle scenes in your manuscript by dragging and dropping them in the outline.
It’s all connected.
And as you can see from this screenshot:
…all the relevant Scene Cards are at your fingertips as you draft your story.
You can also access handy Word Tools in your right navigation menu. This includes a built-in thesaurus and Dabble’s brilliant Read to Me feature. Select a voice and reading speed, then sit back and listen to your story. This feature makes it easier to catch errors as well as the voice and pacing issues that our eyes tend to gloss over.
Like any respectable writing tool, Dabble has grammar and spell checking built-in. But what makes it special is that it also has style guidance (powered by ProWritingAid) and it supports both ProWritingAid and Grammarly extensions.
Quadruple Check Your Historical Accuracy
Now, everyone knows historical fiction readers can be sticklers for accuracy. Your editing process is bound to include tons of fact-checking and even more second-guessing.
Fortunately, Dabble has some excellent features for obsessively thorough writers.
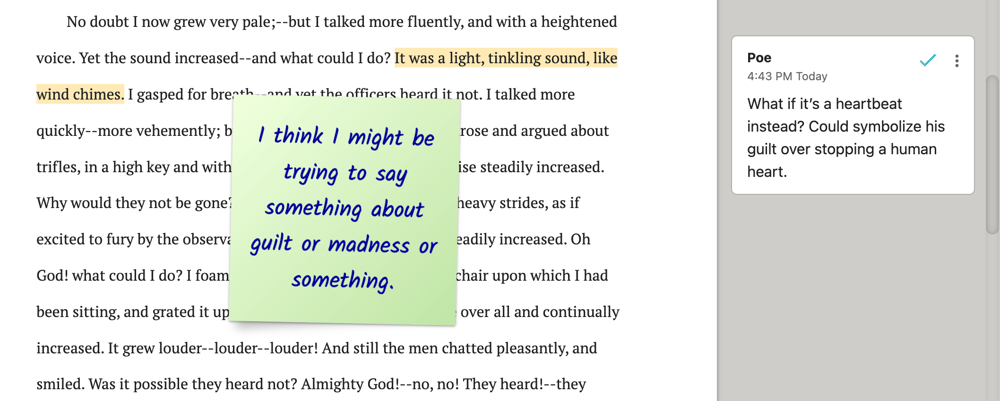
The comments tool is great for leaving notes to yourself regarding story issues, but it’s also a great way to make sure you don’t forget to address a single historical accuracy question.
Sticky notes offer another way to leave reminders for yourself. They do, however, block a lot of your text, so they’re best for big-picture things like, “Find out what businesses she’d be passing walking down this street in 1921.”
And I personally love to use the highlighting feature when I need to remember to look at something later but don’t want to interrupt my flow by writing a full-on note.
I use a color-coded highlighting system for this, though, so that when I look back on the highlighted words “he wore pants” I know I wanted to research what type of pants would be considered nice at the time
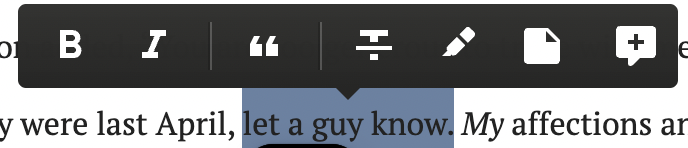
To access any of these features, highlight the text you want to flag for accuracy and a toolbar will appear.
Ready to Make History?
No tool in the world has the power to make writing historical fiction easy. But a program that can turn the tangle of knowledge and ideas in your head into an organized storytelling system is definitely worth a look.
If you’re ready to play around with our historical fiction template, you can find it right here.
And if you don’t have a Dabble subscription, remember that you get two whole entire weeks to explore this tool for free. That includes access to all the functions I mentioned, plus the features we never got around to discussing. You don’t even have to enter a credit card.
Just click this link and the rest is history.
SHARE THIS:


TAKE A BREAK FROM WRITING...
Read. Learn. Create.

Characters are the most important part of any story. They are the beating heart and the blood that flows through your novel’s veins. Yes, your plot and world and story structure are also important, but most people will fall in love with a book because they love the characters.

While they can seem random, cliché, or epic, a surprising amount of thinking should go into what you name your characters. In this article, we break down why names are important, what you need to consider when picking one, and how to name your fictional characters.

You want to know how to write an adventure story—the kind of heart-pounding saga that keeps readers up until the wee hours, whispering, “Just one more chapter,” until their eyes dry out. Well, this is how it's done.