

Plotting with the Plot Grid
Subplots slip through the cracks. The romance stalls for three chapters. A clue you planted quietly vanishes. You know the whole shape is in there somewhere, but you can’t see it all at once. The Plot Grid in Dabble is where you finally can.
It lays your story out on one board. Threads become columns. Beats become cards. You get the big picture, and you rearrange it as the story changes.
Here’s how a Plot Grid works, and how to run one on its own or linked to a book.
We’ll cover:
- What a Plot Grid is: the columns, cards, and how they fit together
- Where to find it: and the plan you need
- Linking a grid to a book: tie your plot to real scenes
- Standalone grids and linked grids: which mode fits which job
- Using the Plots panel while you write: your plot without leaving the page
- Reading the grid: the cues that keep it scannable
What a Plot Grid is
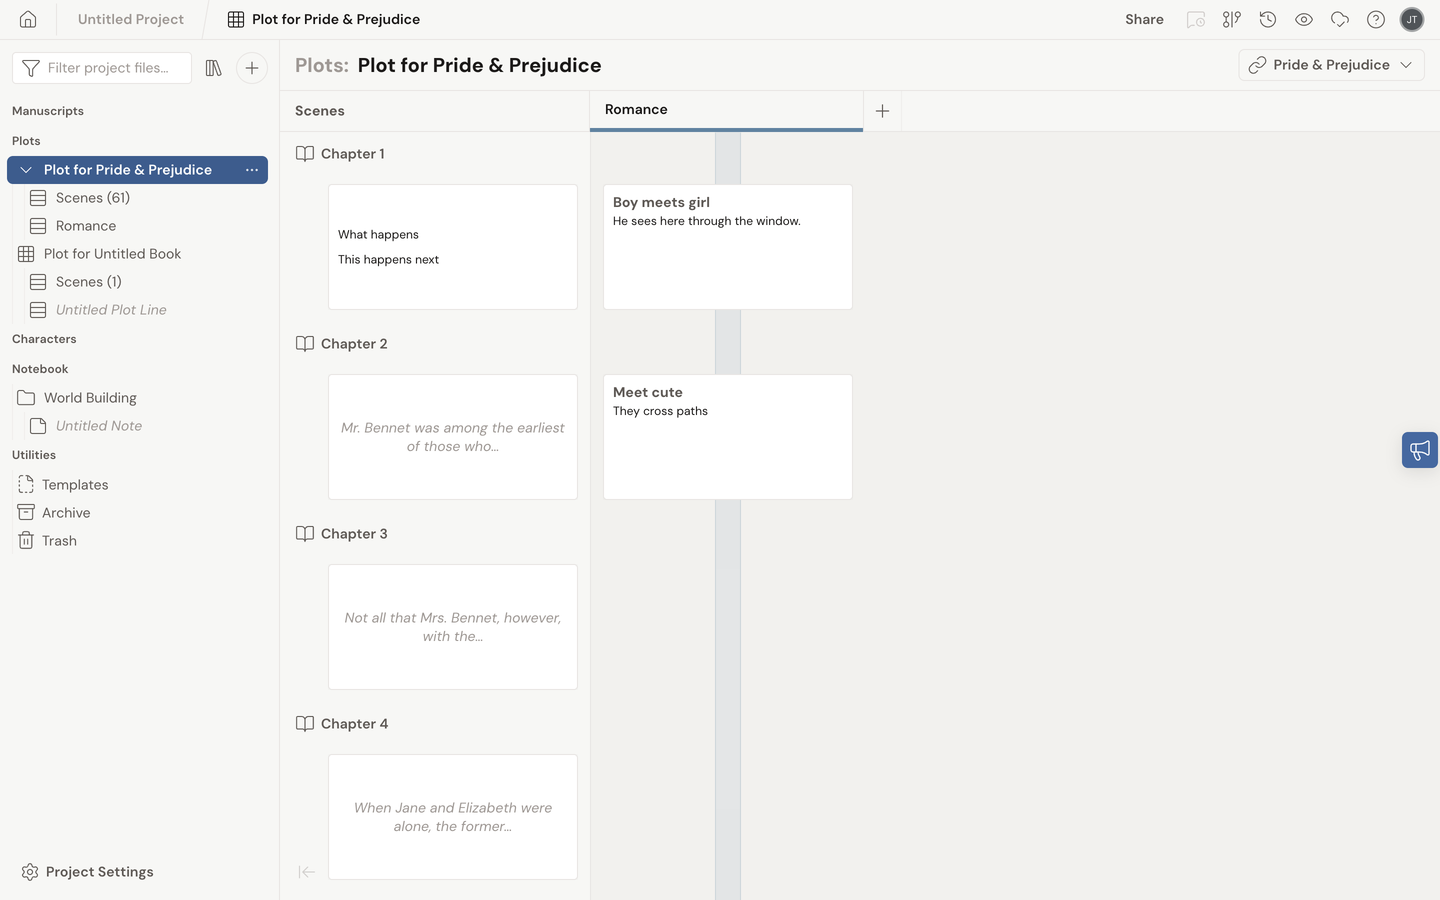
Section titled “What a Plot Grid is”A Plot Grid works like a spreadsheet for your story. Two pieces do the work:
- Plot Lines are the columns. Each one is a thread or arc you want to track: your main plot, a romance subplot, a single character’s journey. A plot line has a title and a color, so your threads stay easy to tell apart at a glance.
- Plot Points are the cards inside those columns. Each card is one moment or beat, with an optional title, a description of what happens, and an optional label.
Keep a grid on its own, as a free-form board of plot lines and cards. Or link it to a book, which adds a leftmost Scenes column so your plot points line up next to the scenes they belong to. More on linking below.
The grid-of-threads idea is the same spreadsheet method many novelists use to keep a tangle of subplots straight, popularized by the outline J.K. Rowling used for the Harry Potter series.
Where to find it
Section titled “Where to find it”Plot Grids live in the Plots section of the left navigation, alongside your manuscript and story notes. A project can hold as many grids as you like, and each one shows up under that section.
The Plot Grid is a premium feature. You need a plan that includes plotting to use it.
Linking a grid to a book
Section titled “Linking a grid to a book”A grid starts out standalone. That’s perfect for brainstorming threads before you know exactly where they land. When you’re ready to tie your plot to real chapters and scenes, link the grid to a book.
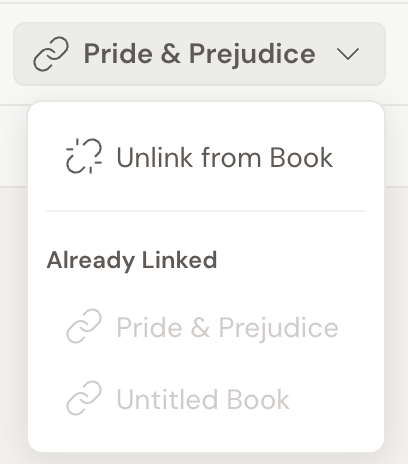
- Open the grid and, at the top right, click Link to Book.
- Under Available Books, choose the book you want.
The grid gains a Scenes column on the left, and its rows now follow your book’s scenes in order. Each plot point sits next to the scene it relates to. Read the Scenes column top to bottom and you get a running summary of your story.
To change or remove the link, open the same dropdown and click Unlink from Book. Books that are already linked to another grid appear under Already Linked and can’t be picked.
Standalone grids and linked grids
Section titled “Standalone grids and linked grids”The whole difference between the two modes is the Scenes column:
- A standalone grid is just plot lines and rows. Rows are generic, so you can insert or delete them freely. It makes a great holding space for ideas that aren’t tied to a specific scene yet.
- A linked grid has the Scenes column. Rows map to your book’s scenes, so reordering scenes in your manuscript reorders the grid to match. You can’t delete a scene row from the grid itself, but you can insert spacer rows between scenes to hold plot points that don’t belong to any one scene.
Each book can link to only one grid, but you can keep as many grids as you want. A common setup: one linked grid per book, plus a few standalone grids for things like a character’s arc, a series-wide subplot, or a finished-versus-still-figuring-it-out comparison.
Using the Plots panel while you write
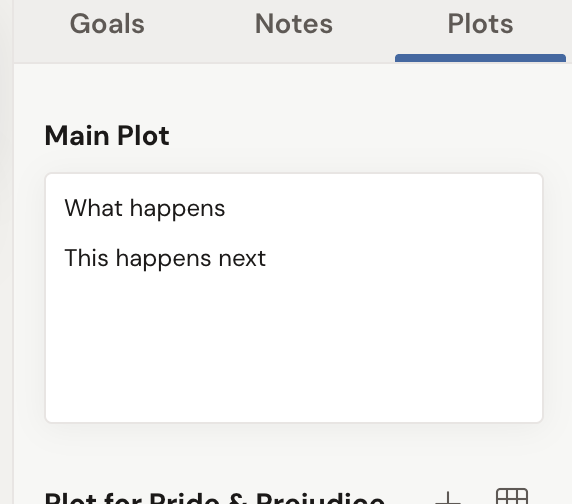
Section titled “Using the Plots panel while you write”You don’t have to open the full grid to check your plot. While you’re writing a scene, open the Plots tab on the right side of the editor. For the scene you’re in, it shows that scene’s own note plus every plot point sitting on the scene’s row, grouped by grid.
From there, add a plot point with the + button without leaving your writing, or jump straight to the full board with the Go to plot grid button.
Reading the grid
Section titled “Reading the grid”A few visual cues keep a busy grid readable:
- The colored bar under each column header is that plot line’s color, echoed as a dot in the Plots panel.
- In a linked grid, the Scenes column stays pinned to the left as you scroll sideways, and the header row stays pinned to the top, so you never lose track of which thread or scene you’re looking at.
Related
Section titled “Related”- Create and use plot lines and points
- Outline with the Scenes view: read your book as a list of scene summaries
- Label scenes, plot points, and notes
- Organize your story notes with folders and files