

Create and use plot lines and plot points
Your plot is a tangle of threads in your head. The main arc, a slow-burn romance, the villain’s quiet scheme, all crossing at once. Here’s how to add plot lines and plot points in Dabble and lay that tangle out where you can see it.
Plot lines are the columns: your threads and arcs. Plot points are the cards inside them: what happens. This how-to walks through adding, editing, and arranging both.
For what the Plot Grid is and when to reach for it, start with Plotting with the Plot Grid.
We’ll cover:
- Add a plot line: start a new column for a thread or arc
- Rename, recolor, or remove a plot line: reshape a column after the fact
- Add a plot point: drop a card for what happens at a beat
- Edit a plot point: change a card’s title, notes, or label
- Move and reorder plot points: drag beats into place
- Add and remove rows: make room in the middle of the board
- Link the grid to your scenes: keep your outline in step with your manuscript
- Move a scene that has plot points: decide what its cards do
- Add plot points and lines while you write: work the grid from the Plots sidebar
Before you begin
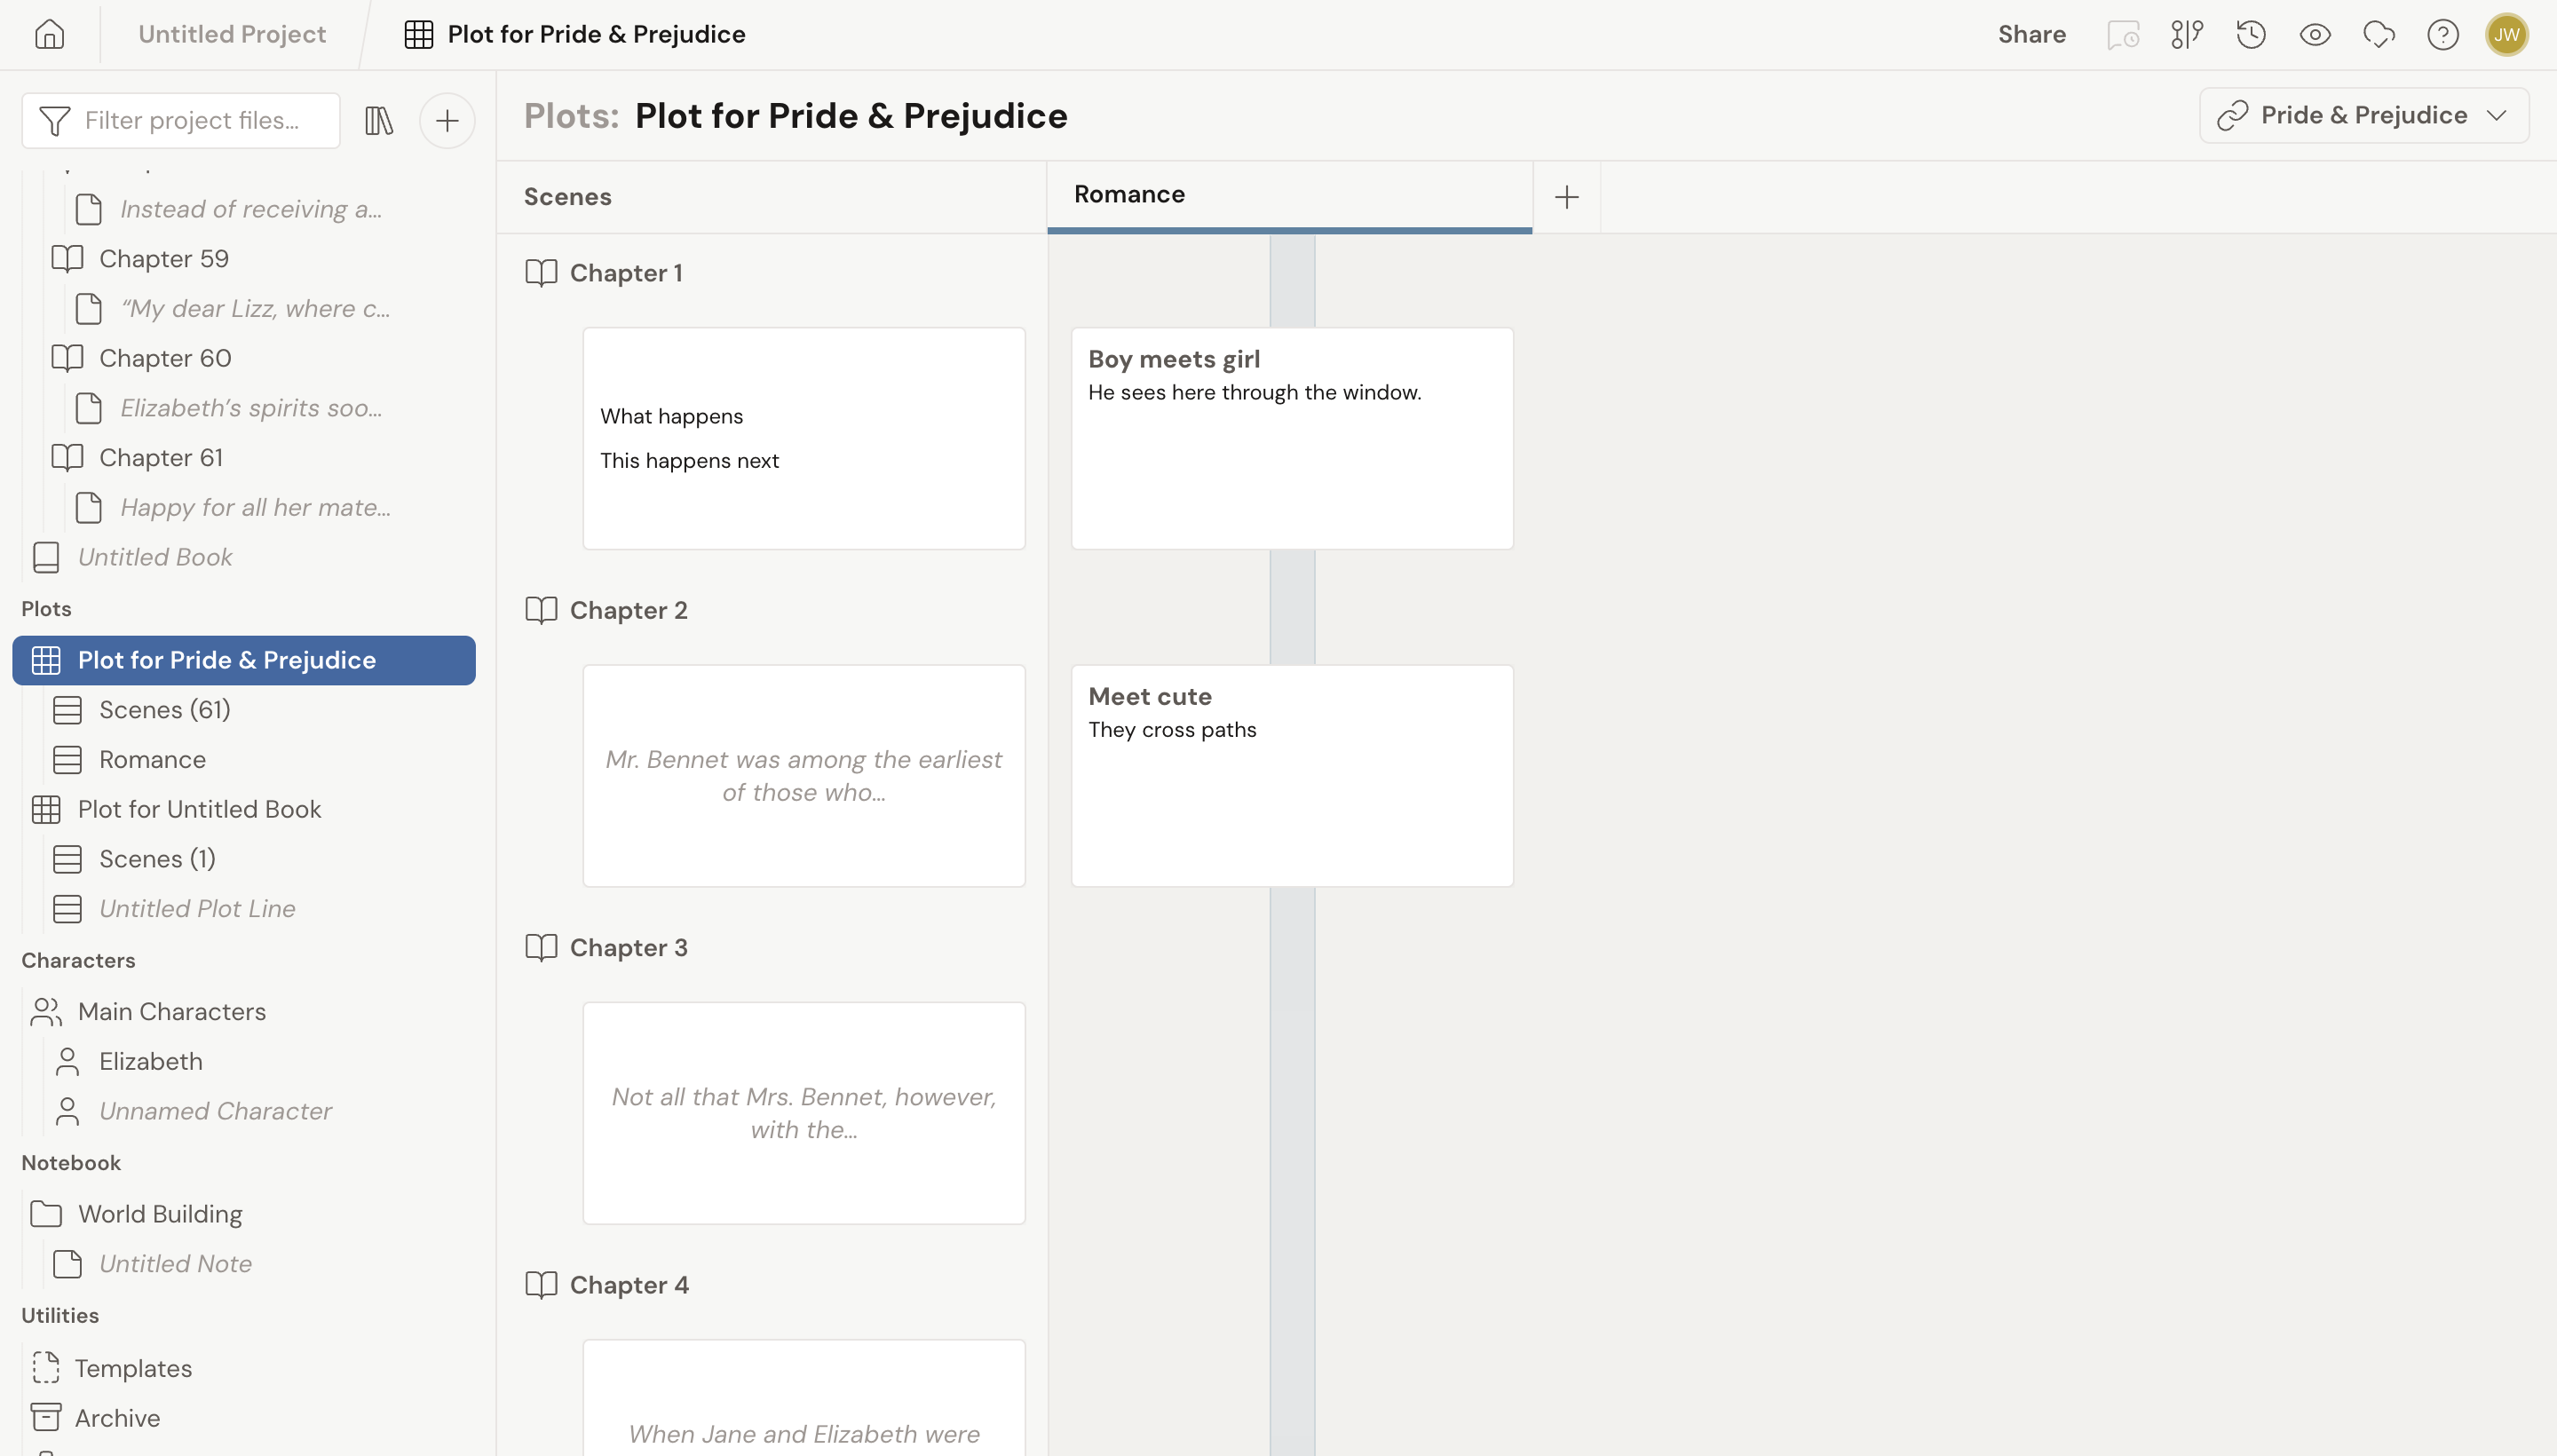
Section titled “Before you begin”The Plot Grid lives in the left navigation, under the Plots section. Open one to see the board before you start.
When a grid is linked to a book, the leftmost column is Scenes, and every other column is a plot line.
Add a plot line
Section titled “Add a plot line”A plot line is a column. One thread or arc per column: the main plot, a romance subplot, a single character’s road through the book. Every line gets a title and a color.
- Open a Plot Grid from the Plots section in the left navigation.
- Click the + tile at the right end of the header row. Dabble creates an untitled, auto-colored plot line.
- Click the column header and type to name the line. The title saves when you click away or press Enter.
A grid that isn’t linked to a book and has no lines yet shows an Add a Plot Line button on the empty board instead. It does the same thing.
Rename, recolor, or remove a plot line
Section titled “Rename, recolor, or remove a plot line”Named a line in a hurry? Nothing here is permanent.
- To rename, type directly in the column header. Your change saves when you click away or press Enter.
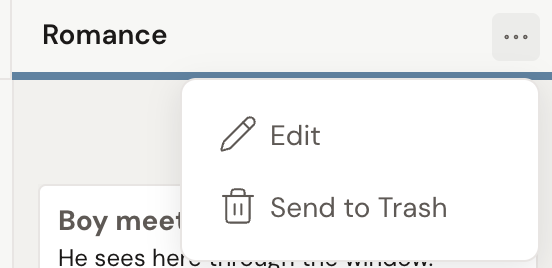
- To change the name or color, hover the column header, open the ••• menu, and click Edit. This opens Plot Line Settings with a Name field and a Plot line color picker. Click Save.
- To remove the column, open the same ••• menu and click Send to Trash. This also trashes the plot points in that column.
- To reorder columns, drag a column header left or right.
Add a plot point
Section titled “Add a plot point”A plot point is a card in a cell, where a plot line crosses a row. It holds what happens at that beat.
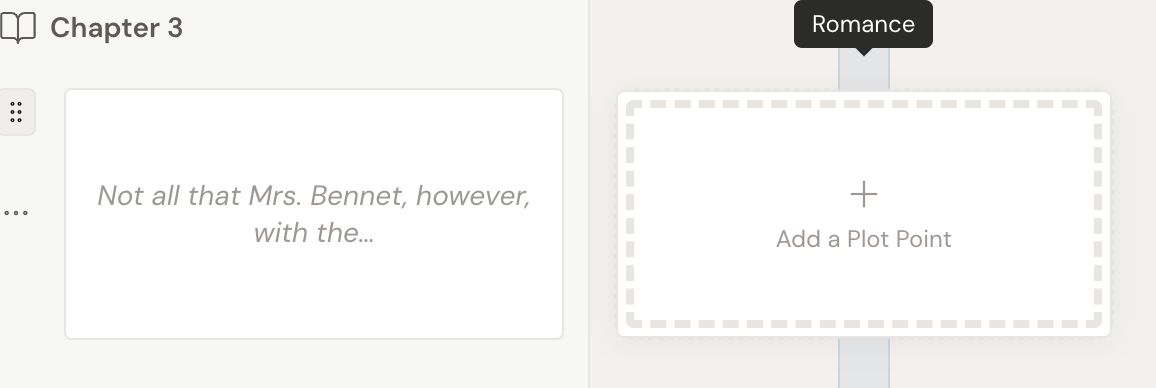
- Hover an empty cell in a plot line column. A dashed Add a Plot Point tile appears.
- Click the tile to create the plot point and open its edit form.
- Fill in a title, a description of what happens, and an optional label.
Close the form on an empty plot point and Dabble discards it, so it never clutters your grid.
Edit a plot point
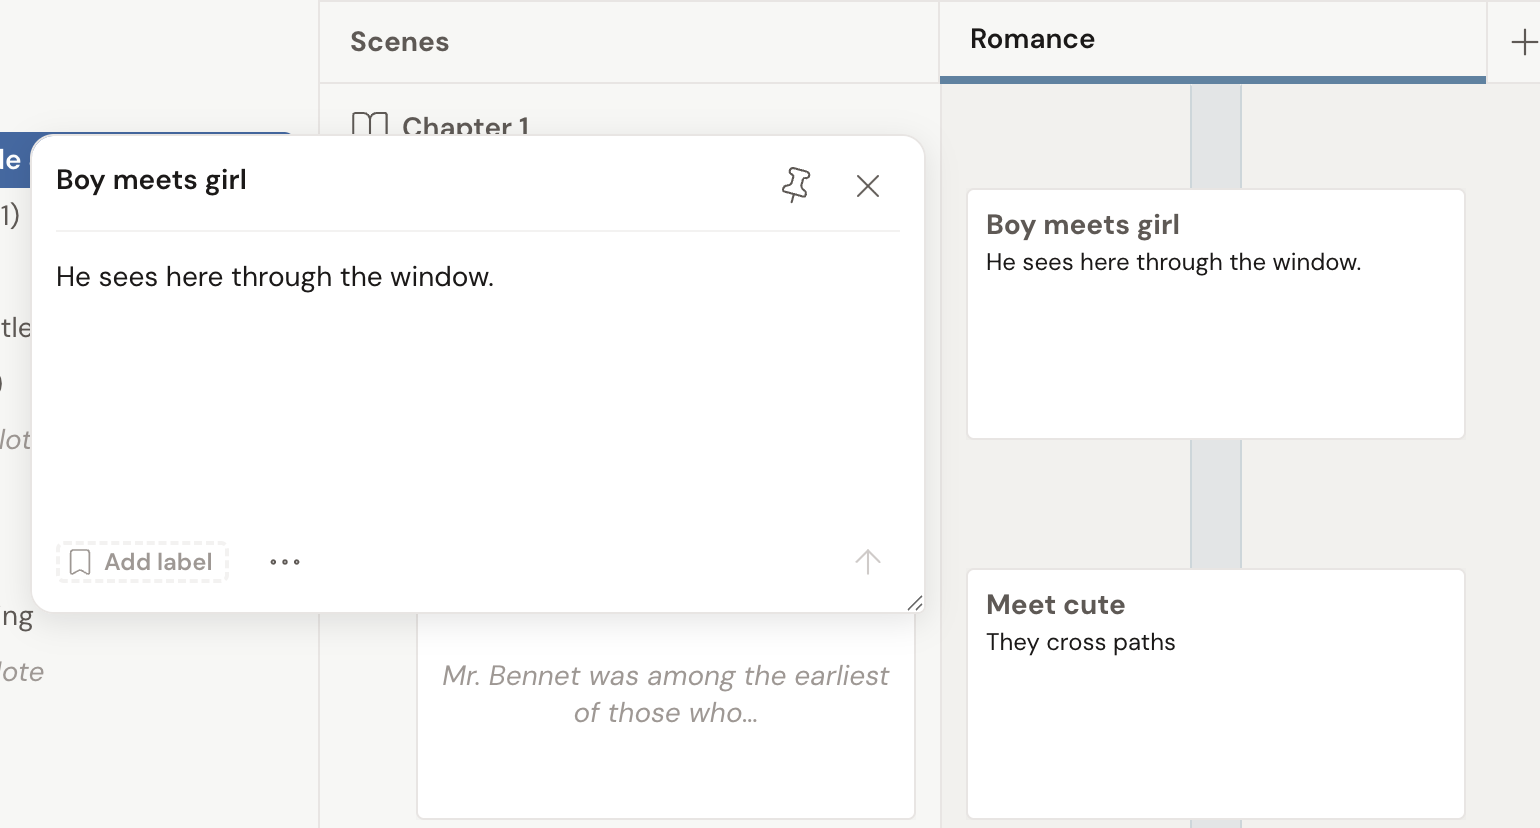
Section titled “Edit a plot point”- Click the plot point card. A form opens with a title, rich-text content, and a label.
- Type your changes. Edits save automatically as you go.
- To delete the plot point, open the ••• menu on the form and click Send to Trash.
Pin the form to keep it open while you work.
Move and reorder plot points
Section titled “Move and reorder plot points”Rearranging is all drag-and-drop.
- Drag a plot point card up or down within its column to reorder it.
- Drag it sideways to move it to another column or row.
- Drop a card onto an occupied cell to swap the two cards.
Add and remove rows
Section titled “Add and remove rows”Rows are the board’s horizontal slices. Sooner or later a beat needs to go between two beats you already have, and that means a new row.
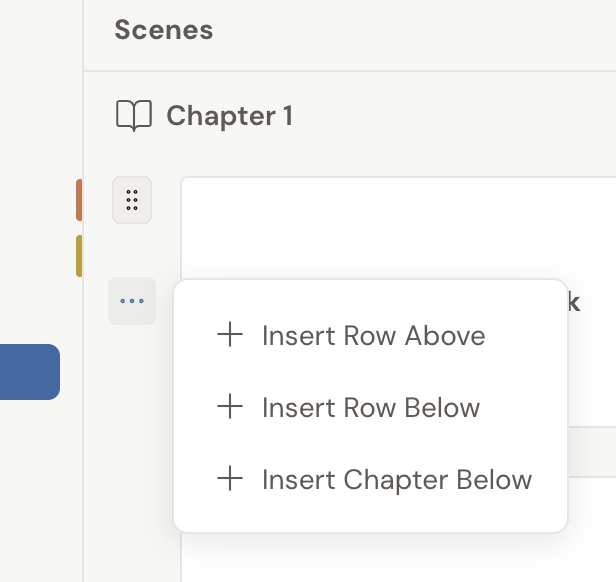
Hover the far-left edge of any row. A drag handle and a ••• button appear beside it.
- Click the ••• button on the row.
- Click Insert Row Above or Insert Row Below. Dabble slides an empty row into place and pushes the rows below it down.
- To take a row out, open the same menu, click Delete, then confirm with Confirm Delete.
- To reorder rows, drag the handle up or down.
The grid always keeps a few empty rows below your last one, so you don’t need to add a row just to keep going at the bottom. Click into any empty cell and start a plot point there.
What a row is depends on the grid:
- In a standalone grid, a row is nothing but a row. Insert one anywhere, delete any row you like, and drag any row that holds cards into a different order.
- In a grid linked to a book, most rows are scenes. Insert a row between two scenes and you get an empty spacer row: no scene, just a place to park plot points that don’t belong to any one scene. Spacer rows can be deleted. Scene rows can’t, because deleting one would mean deleting a scene out of your manuscript, so the row menu leaves Delete off. Only scene rows get a drag handle, and dragging one reorders the scene in your book.
An empty spacer row doesn’t have to stay empty. Hover its cell in the Scenes column and click the dashed Add a Scene tile, and Dabble creates a real scene right there, in the right chapter.
Break a chapter from the grid
Section titled “Break a chapter from the grid”A linked grid can restructure your book, not just describe it. On a row that belongs to a chapter, the same ••• menu offers two more items:
- Insert Chapter Below starts a new chapter after this scene. Every scene that came after it in the old chapter moves into the new one.
- Insert Chapter Above does the same in the other direction. It’s hidden on the first scene of a chapter, where a chapter break already sits.
Both change your manuscript. The grid’s rows and the chapter headings redraw to match.
Link the grid to your scenes
Section titled “Link the grid to your scenes”When a grid is linked to a book, a Scenes column appears on the left and your rows line up with your scenes, so your outline and your manuscript stay in step. See Plotting with the Plot Grid for how linking works.
While you write, open the Plots tab on the right to add and review plot points for the scene you are working on, then click Go to plot grid to jump back to the board.
Move a scene that has plot points
Section titled “Move a scene that has plot points”Chapter nine works better as chapter four. You drag the scene, and Dabble stops to ask you something, because a scene with plot points on it is really two things moving at once.
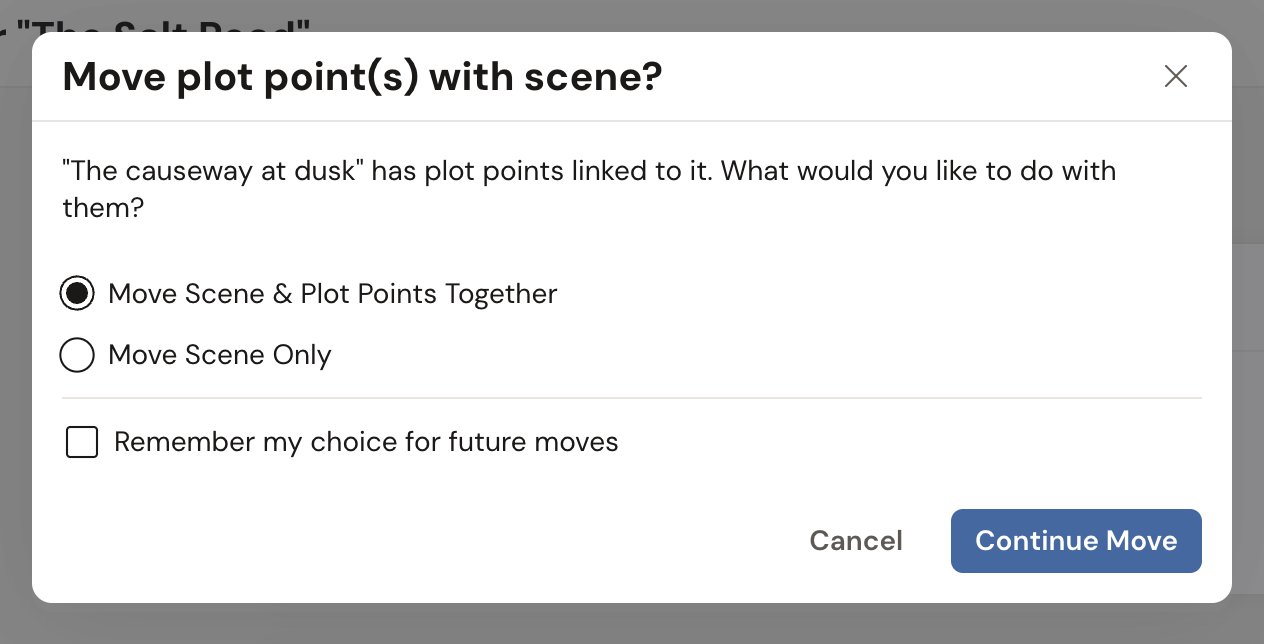
The dialog is titled Move plot point(s) with scene? It names the scene, then gives you two choices:
- Move Scene & Plot Points Together. The cards travel with the scene. Your plot lines follow the new order of the book.
- Move Scene Only. The scene moves. The plot points stay put in their plot lines, on a row of their own where the scene used to be.
Pick one and click Continue Move. Cancel leaves the scene where it was.
You’ll see this whenever you move a scene through your manuscript: dragging it in the left navigation, or dragging its card in the Scenes view.
Dragging a row by its handle on the grid itself is different. The whole row moves, scene and cards together, so there’s nothing to ask.
Stop being asked
Section titled “Stop being asked”If you always answer the same way, tick Remember my choice for future moves before you click Continue Move. Dabble stores that answer and stops asking.
To change your mind later:
- Open the account menu and click Preferences.
- Go to the Advanced tab and find the Plots section.
- Turn Ask what action to take when moving a scene back on to get the dialog again. Leave it off and pick the default you want: Move Scene & Plot Points Together or Move Scene Only.
Add plot points and lines while you write
Section titled “Add plot points and lines while you write”You don’t have to leave your scene to log a beat. The Plots tab on the right lets you work the grid from inside your manuscript.
- Open the scene you’re writing.
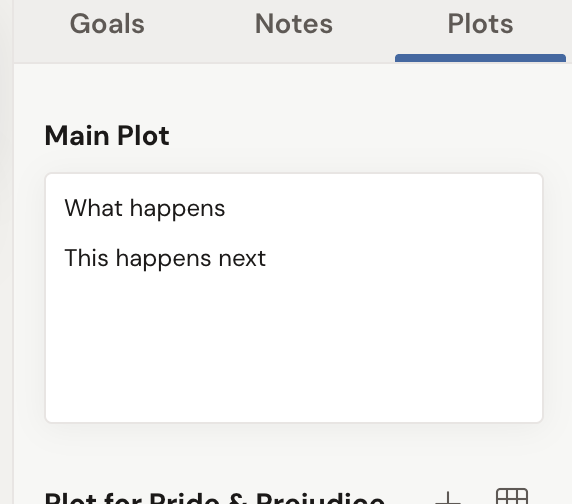
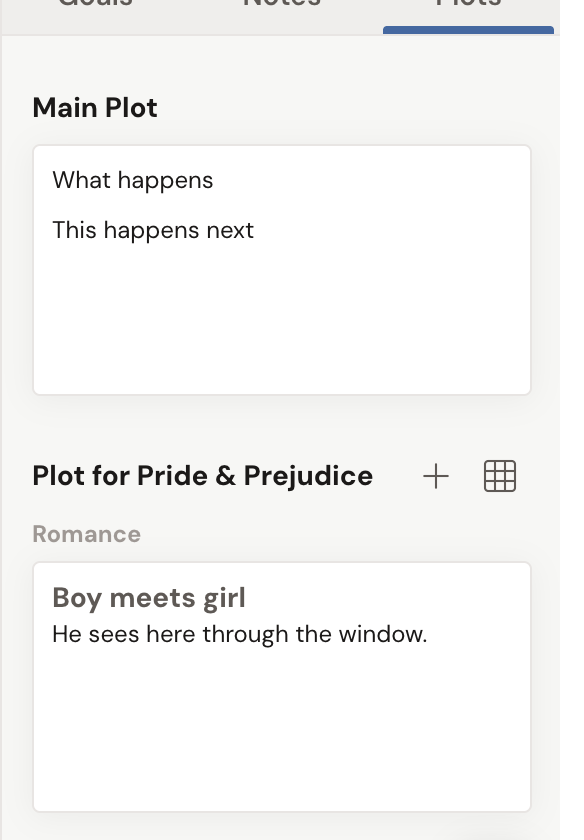
- Click the Plots tab in the right sidebar. It shows the plot points tied to this scene, grouped by grid.
- Click the + button beside a grid’s name (its tooltip reads Add a Plot Point). A menu lists that grid’s plot lines.
- Pick the plot line you want, and the new card lands on this scene’s row. Fill in its title, description, and optional label.
- Want a whole new thread? The same menu ends with Add a Plot Line. No trip to the board required.
Everything you add here lands on the grid too. Same plot, one view for planning and one for writing.
- Plot line colors are assigned automatically and shown as a colored bar under each column header, so each thread stays easy to spot.
- Leave a plot point’s label off until you need it. Labels are most useful once you have enough beats to want to filter or scan them.
Related
Section titled “Related”- Plotting with the Plot Grid: what it is and how to plan with it
- Outline with the Scenes view: the same scenes, without the plot lines
- Label scenes, plot points, and notes: color-code your cards
- How Dabble organizes your story
- Organize Story Notes
- Export your manuscript